

Early stages showing foundation holes marked out on grass. 40 holes 600x600x600mm. For most of the digging the ground was frozen solid, very hard work.
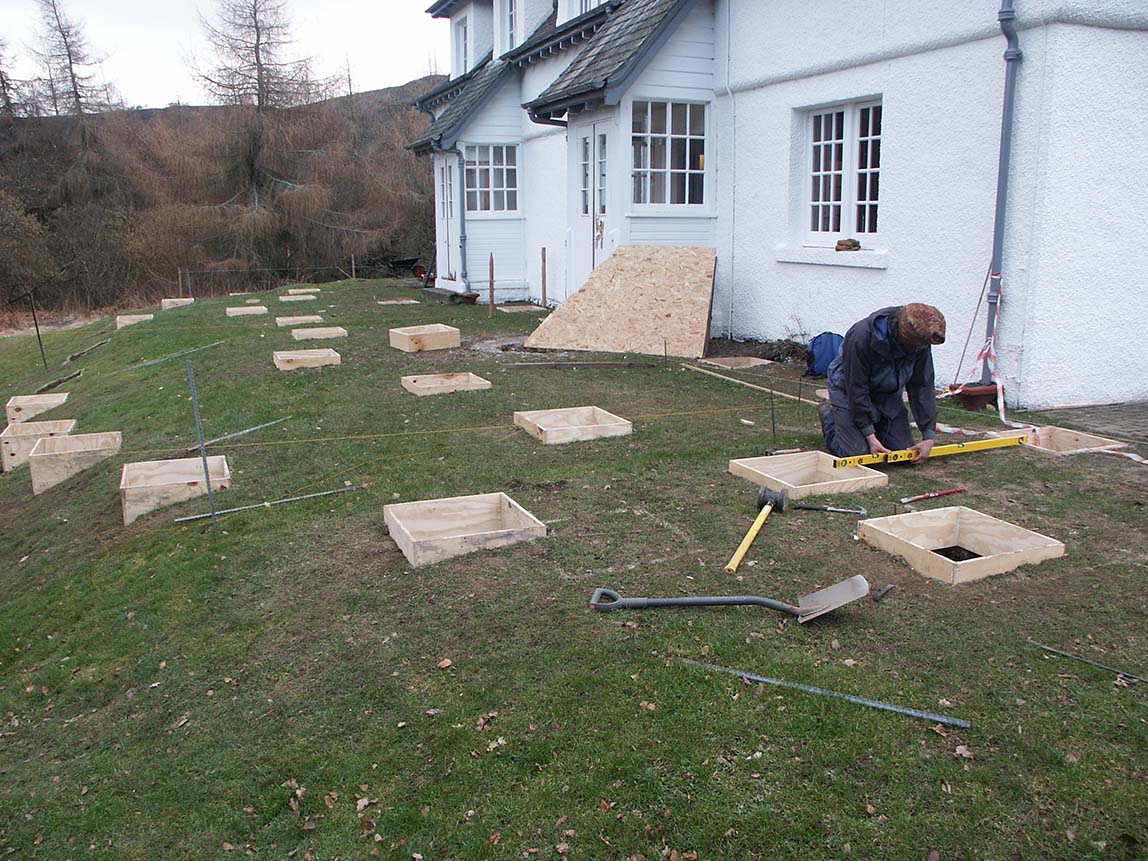
Scott meticulously positioning the shuttering, we spent ages making sure they were all exactly level with each other.
February 2004 just two more holes to shutter.
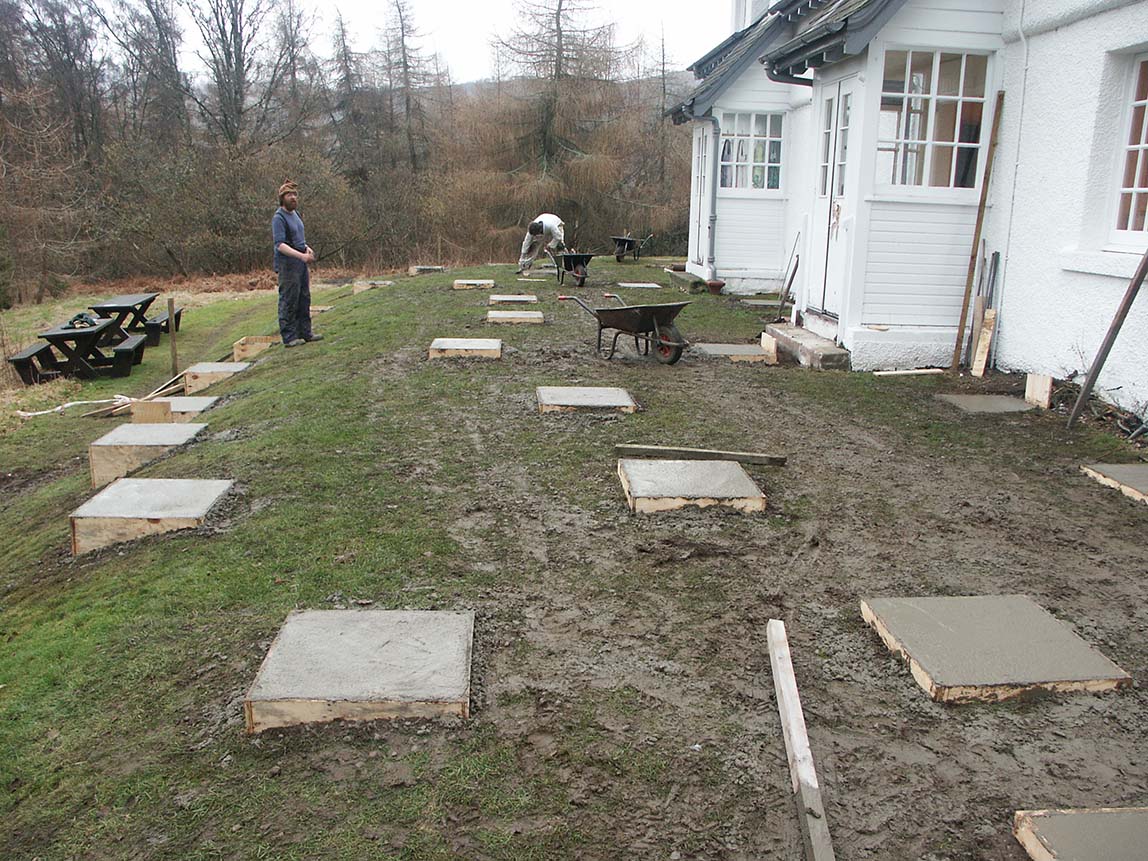
The day the concrete lorry arrived. Turned out all the time we took levelling the shuttering was wasted, as we had to fill the holes quickly. It was also hard to pour the concrete in without hitting the shuttering with the barrow. We went back over each foundation and relevelled the concrete before it set.
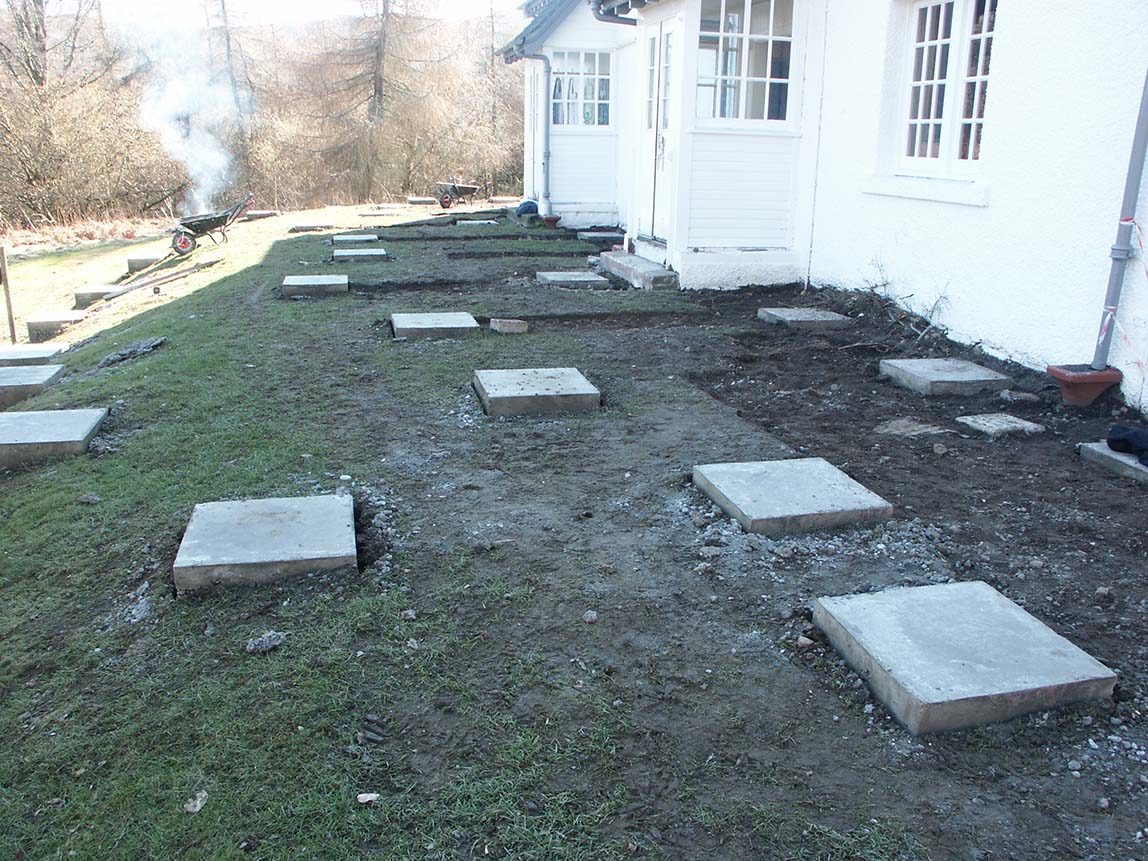
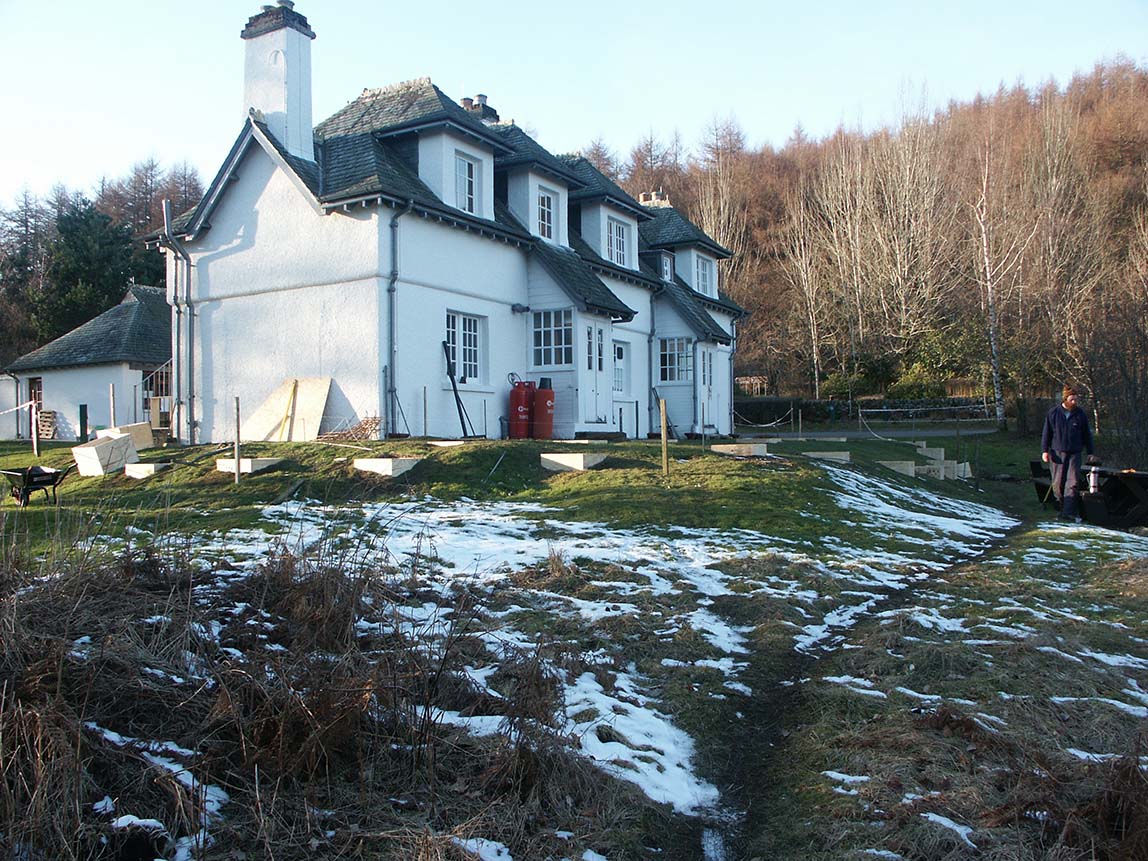
A couple of days later, shuttering removed and a lot of topsoil removed to allow air space under the beams.
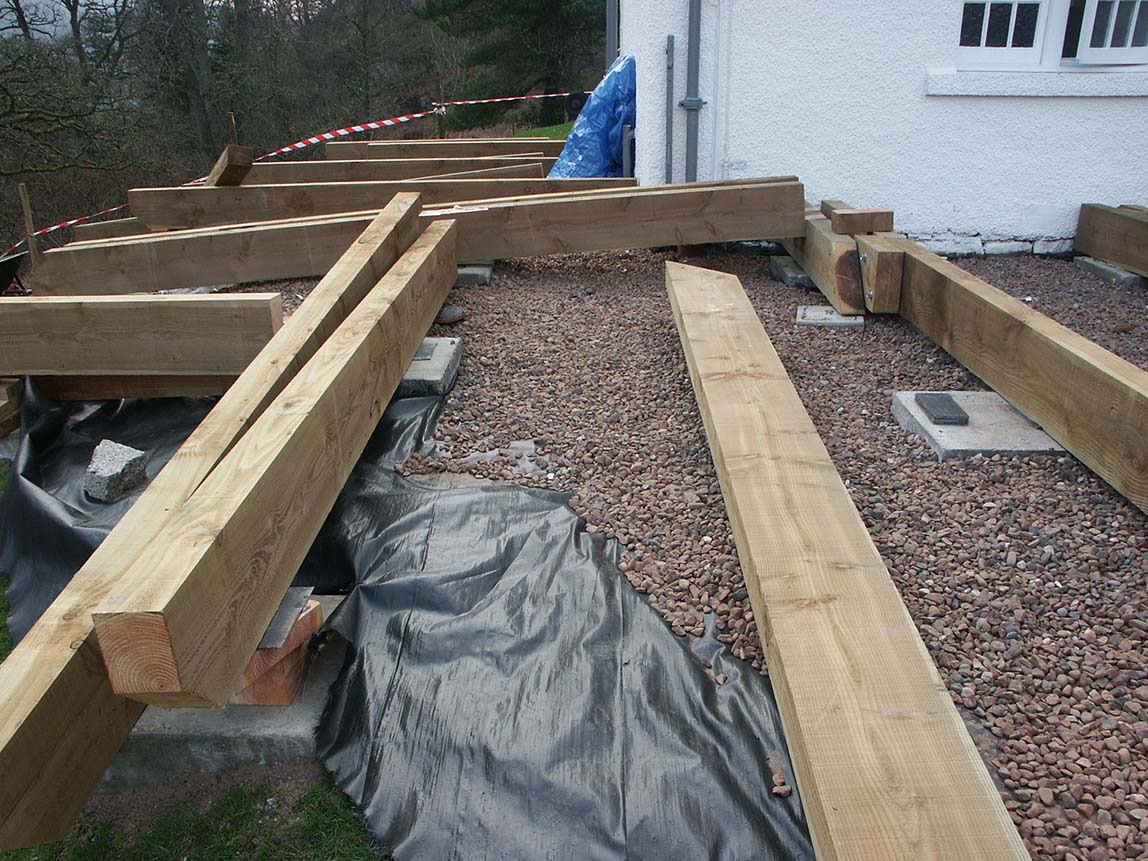
Geotextyle sheet laid to stop grass growing held down with gravel. Beams positioned roughly in pairs. The beams are 300x125mm and were delivered in almost 5 metre lengths. Very heavy to move about and work with. You can see one of the beam joints, they were bolted together with four 20mm thick steel threaded rods with a spacer block inbetween.
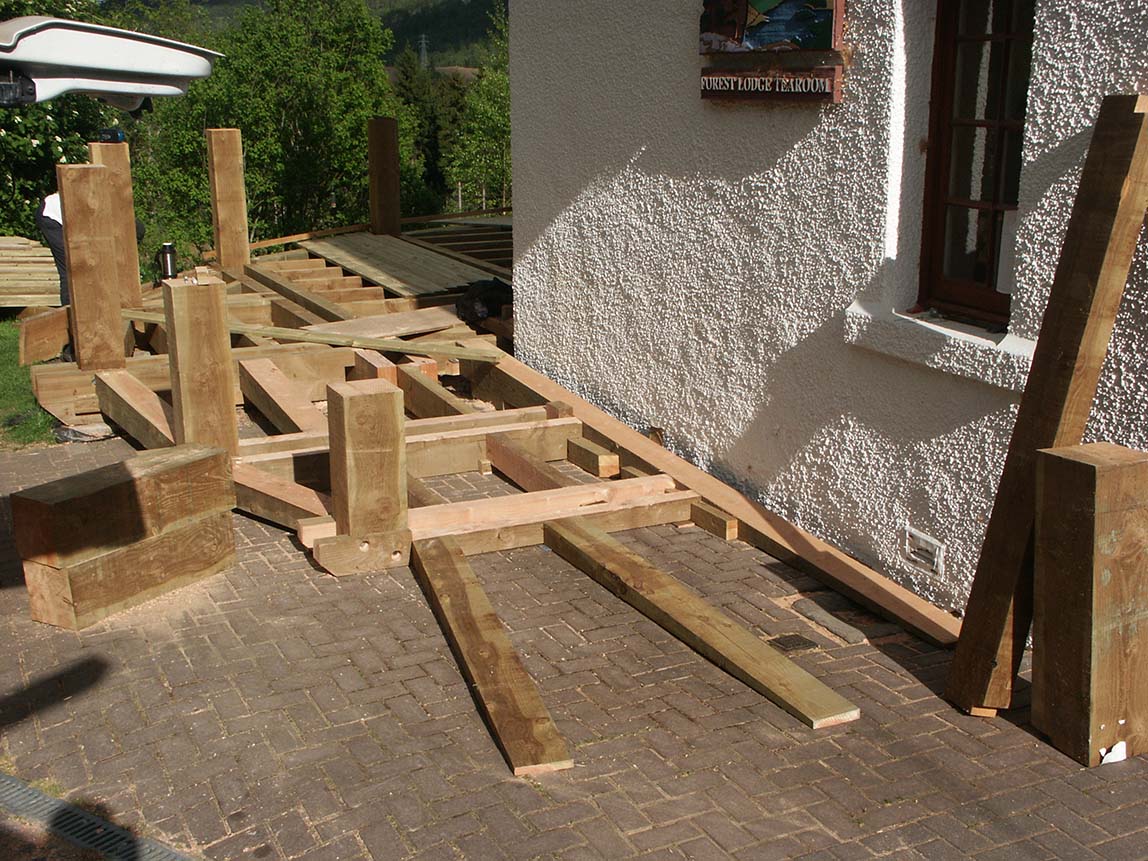
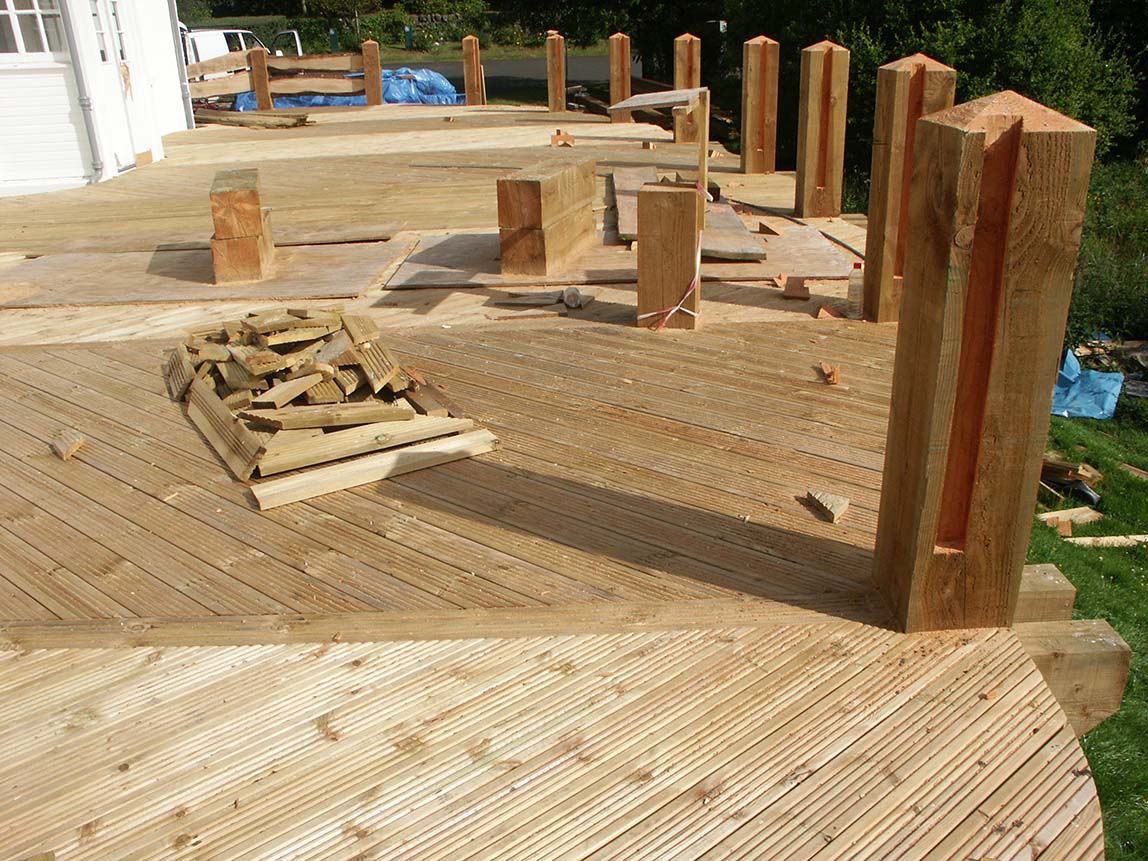
Starting to fit the end posts. The posts are 250mm square, you can see the wood for the posts piled up in the background. Compare them to Scott's van and you might get an idea of the weight. The posts were recessed for the beams to slot in, and later bolted together with two 20mm threaded rods. You can see a couple of sheets of lead lying on two of the foundations to the left, this lead was used to keep the beams and posts off the foundations to prevent rain water soaking into the wood. We later placed a layer of bituthene inbetween the lead and the wood to increase water insulation.
Posts at the other end of the deck showing bevelled beam ends. The posts were all different heights due to the changes in ground level. Blocks of wood in the foreground were used to prop up the beams before slotting the posts in. All of the positioning, levelling cutting and joining of the wood was made a lot harder because it was all so bloody heavy.
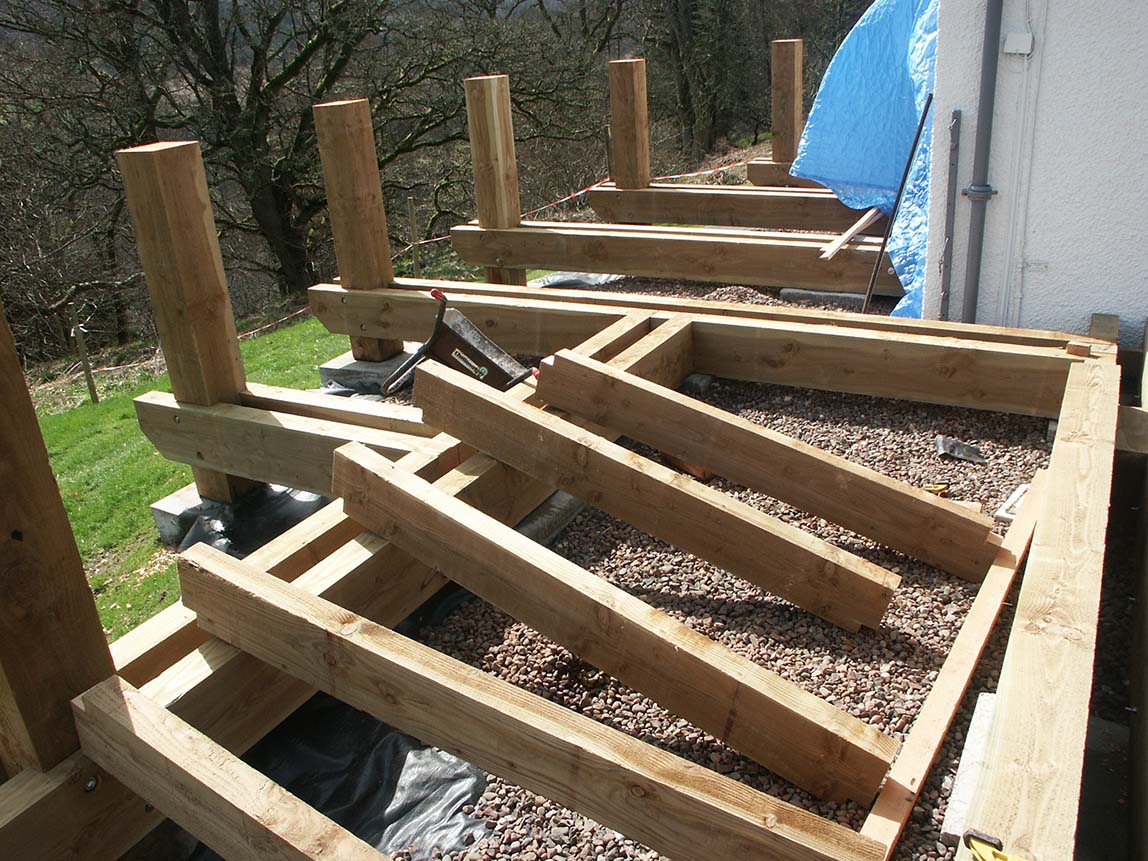
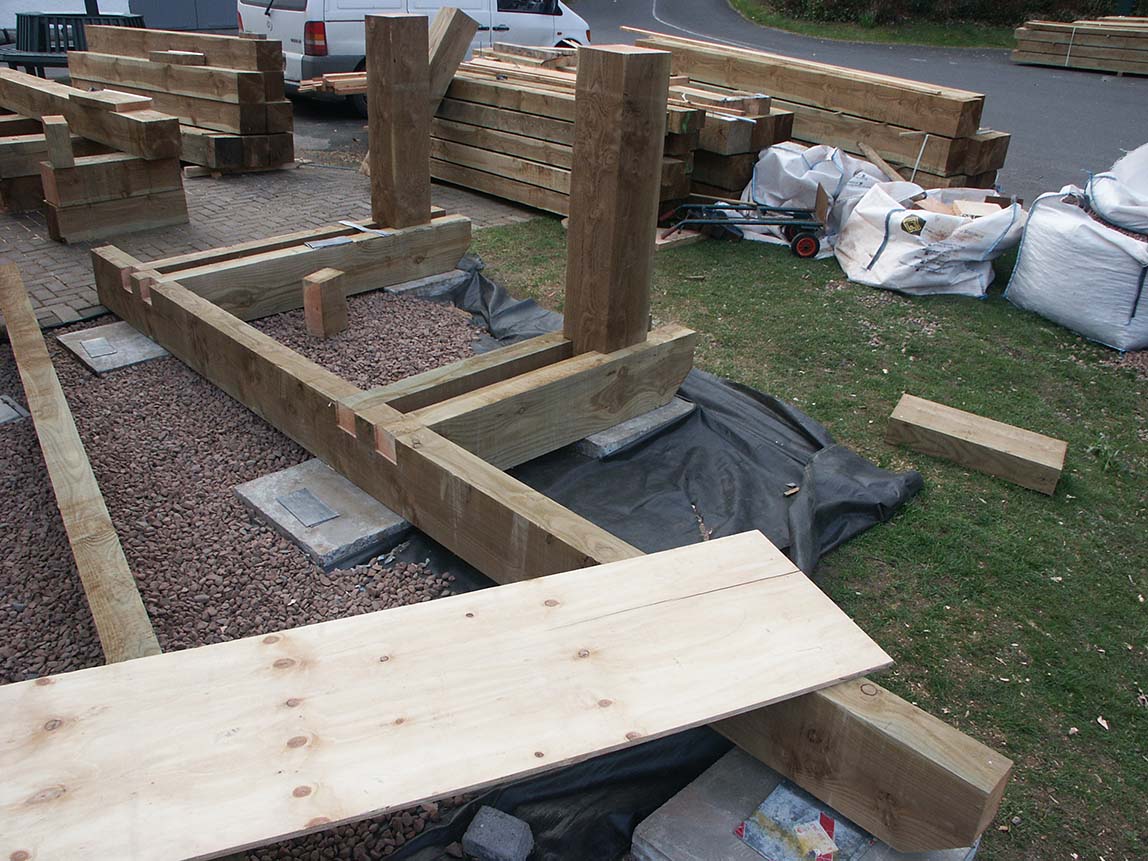
Joists cut and placed ready for fitting. Joist were 220x90mm recessed and slotted onto battens that were bolted at 600mm centres to the beams. The joists were then cheek nailed to the beams with 6 inch nails. All the nails were hammered in by hand, lots of nails, lots of hard work. We both got good at hammering though, and I could eventually hammer a nail in in 3 hits, Scott could only manage 4.
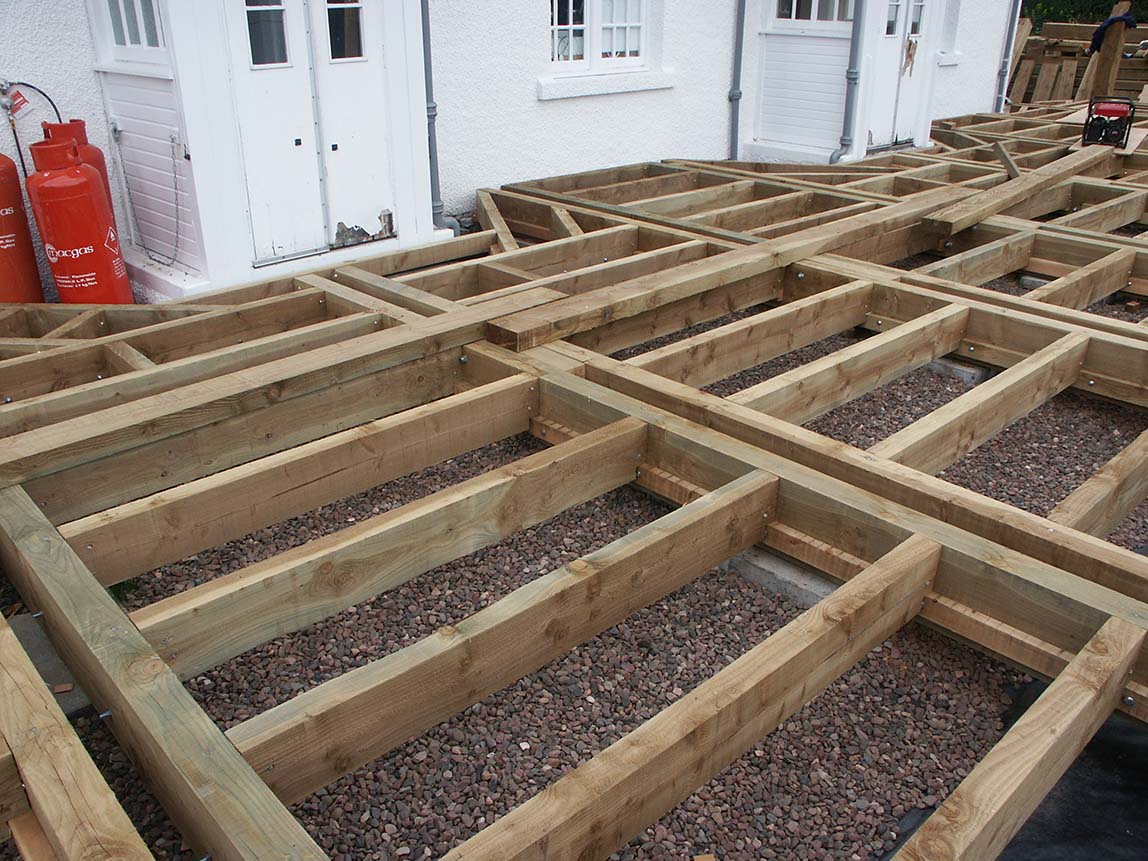
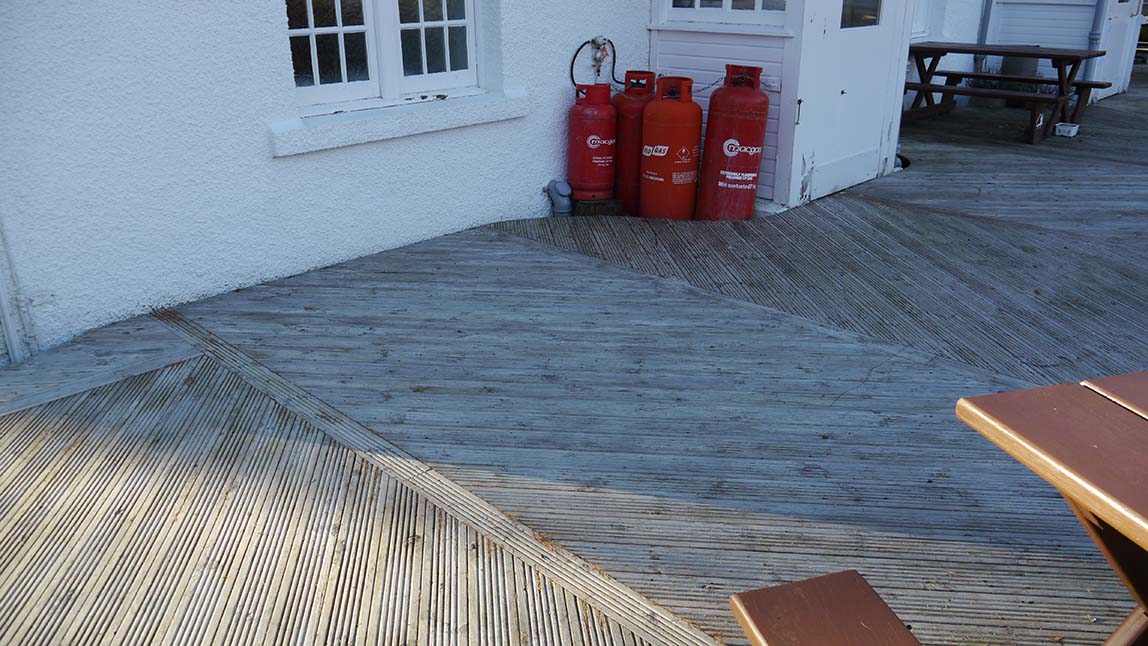
You can see the battens supporting the joists, also the diagonal joists to support the deck near the building walls. The large gas bottles are regularly changed and, once the deck was laid, a removable section of deck was made so that the bottles wouldn't damage the deck's edge. I made this part myself, it is excellent verging on perfection.
South side of deck showing diagonal step, this was also kept off the concrete by lead and bituthene. Edge beams have also been added here inbetween every post. It was not easy working out how to cut these so they slotted in tightly. Edge beams were 180x150mm secured to posts by drilling diagonally then fitting large coach screws. You can see the holes where 6 of these coach screws are holding the step together.
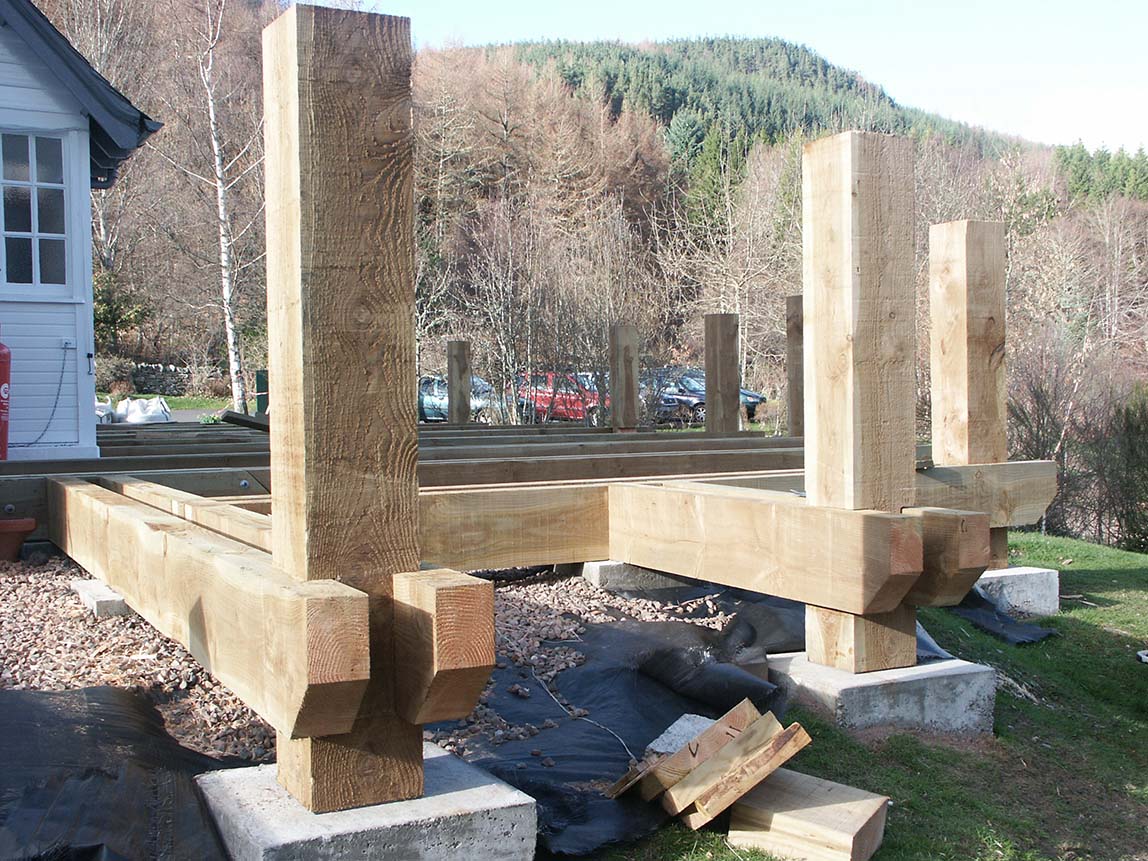
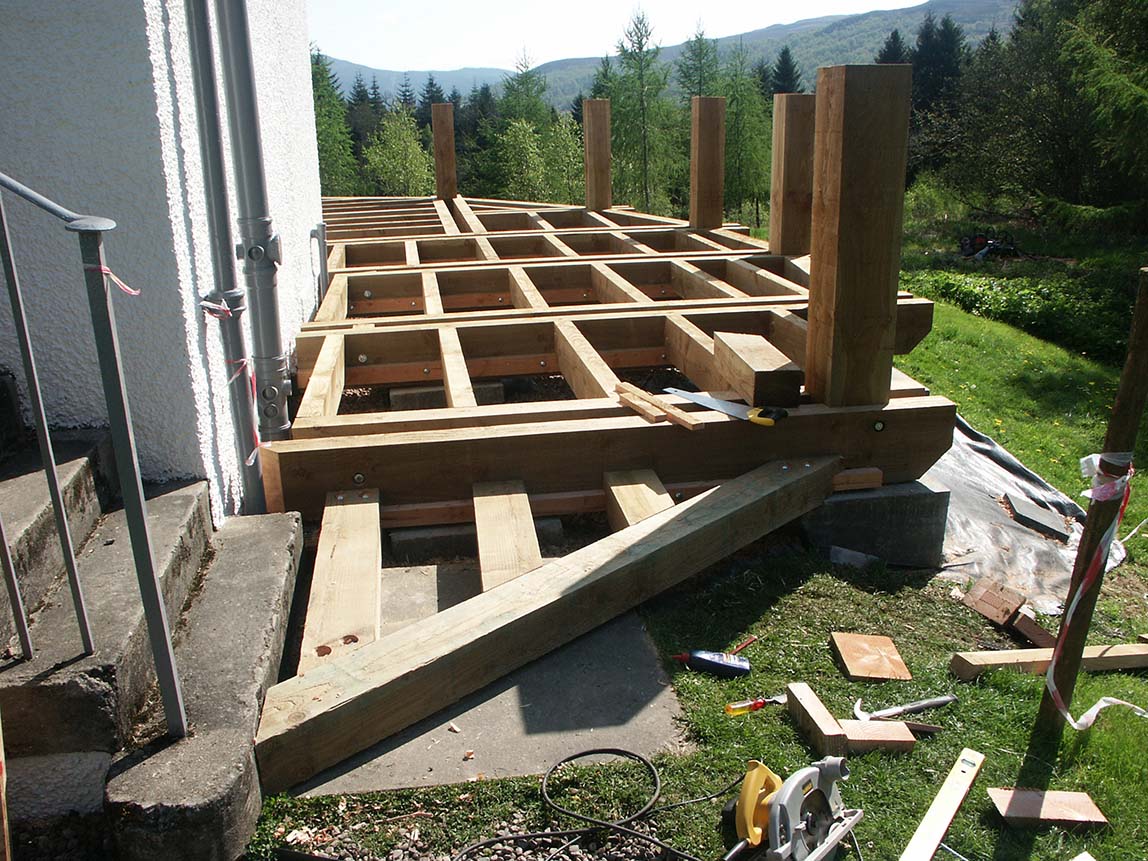
Almost ready for the deck going down. The slatted wood through the posts was my idea so as usual it wasn't used. This whole project was Scott's, so although I came up with loads of brilliant ideas, it was always done Scott's way. And I think it turned out to be a very impressive peice of engineered sculpture. Of course if it had been done my way it would have been excellent.

The deck's arrived though. All of the wood for this deck was cut from locally grown forestry commission timber. The forestry commission own the Queens view centre and them, being a commission, commissioned Scott to do the work. (They're actually quite commissioney people). The beams, posts and joists are all douglas fir and the deck is Norwegian spruce.
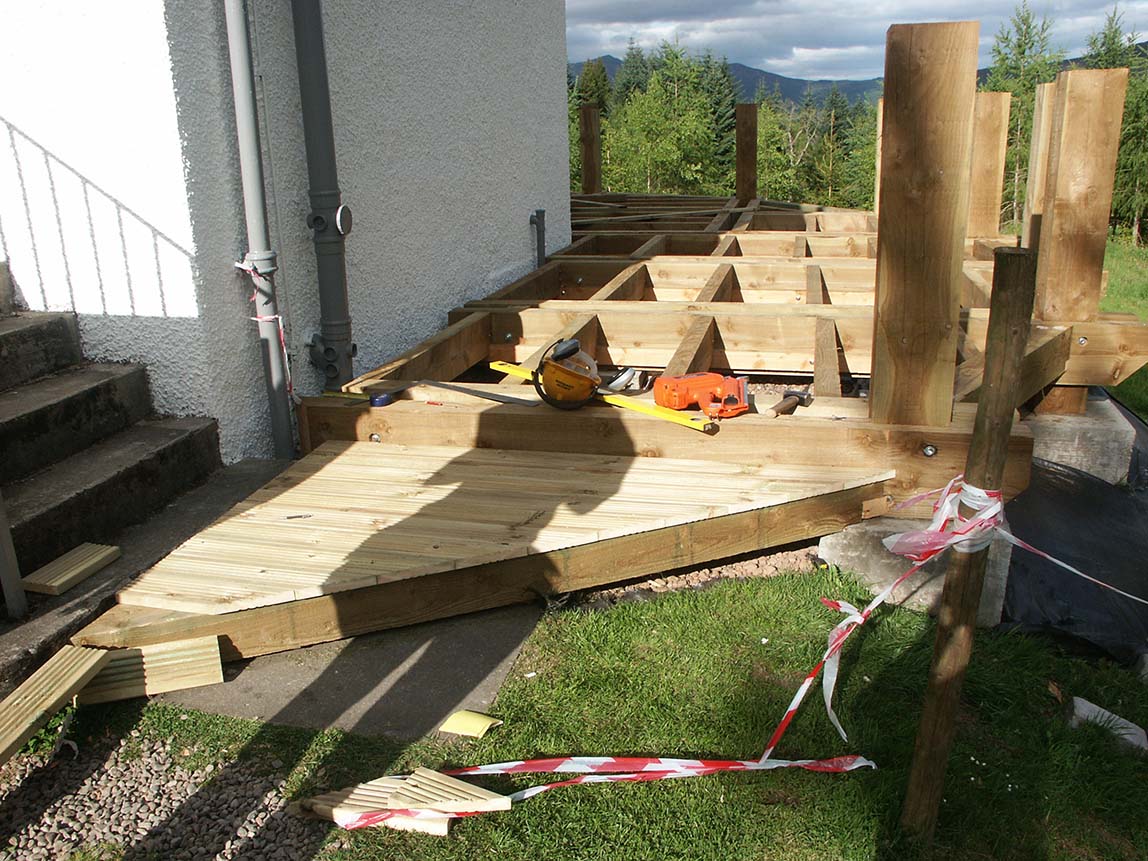
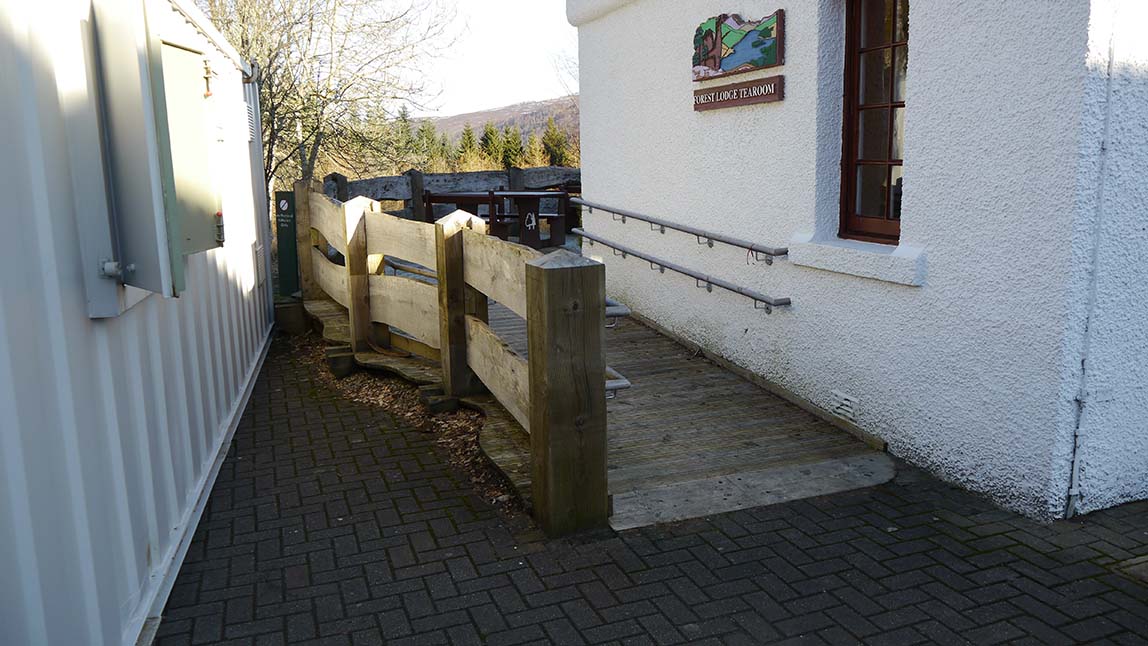
The disabled access ramp taking shape. The brick paving was very uneven so a lot of time was spent on the underside of the wood to make it sit properly.
The first of the deck going down. This was secured with galvanised nails using the nailgun. Lead spacers were used to leave a gap between each plank to allow for expansion. The deck was cut from trees that had just been felled, so the wood was still wet when it was delivered.

Starting to lay the decking, each plank had to be cut slightly longer than a test plank. Then the ends were planed to fit tightly between the bay separating planks above the beams. A lot of the planks were slightly twisted and had to be forced straight before nailing.
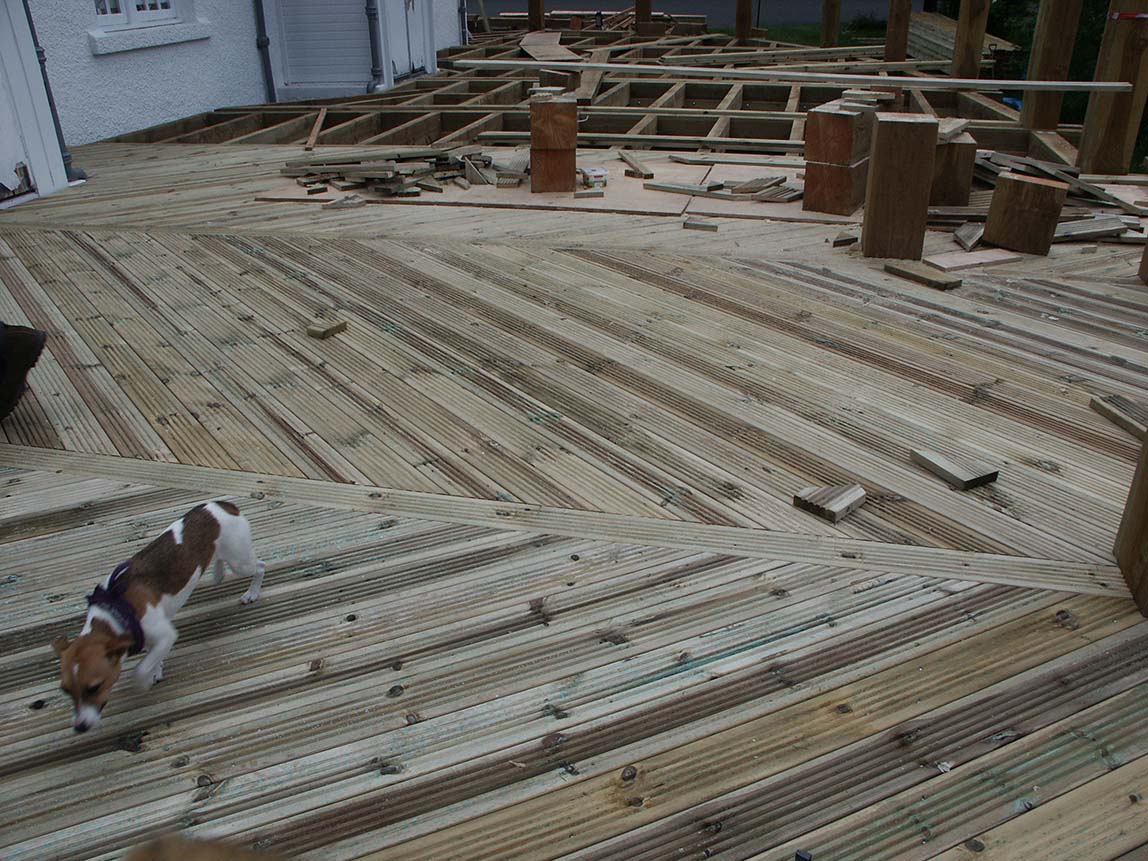
Special guest appearance by Sassy the wee dug. Two small offcuts of wood are strategically placed near the centre of the photo so I could line my camera's viewfinder up to the same position every day for my animations.
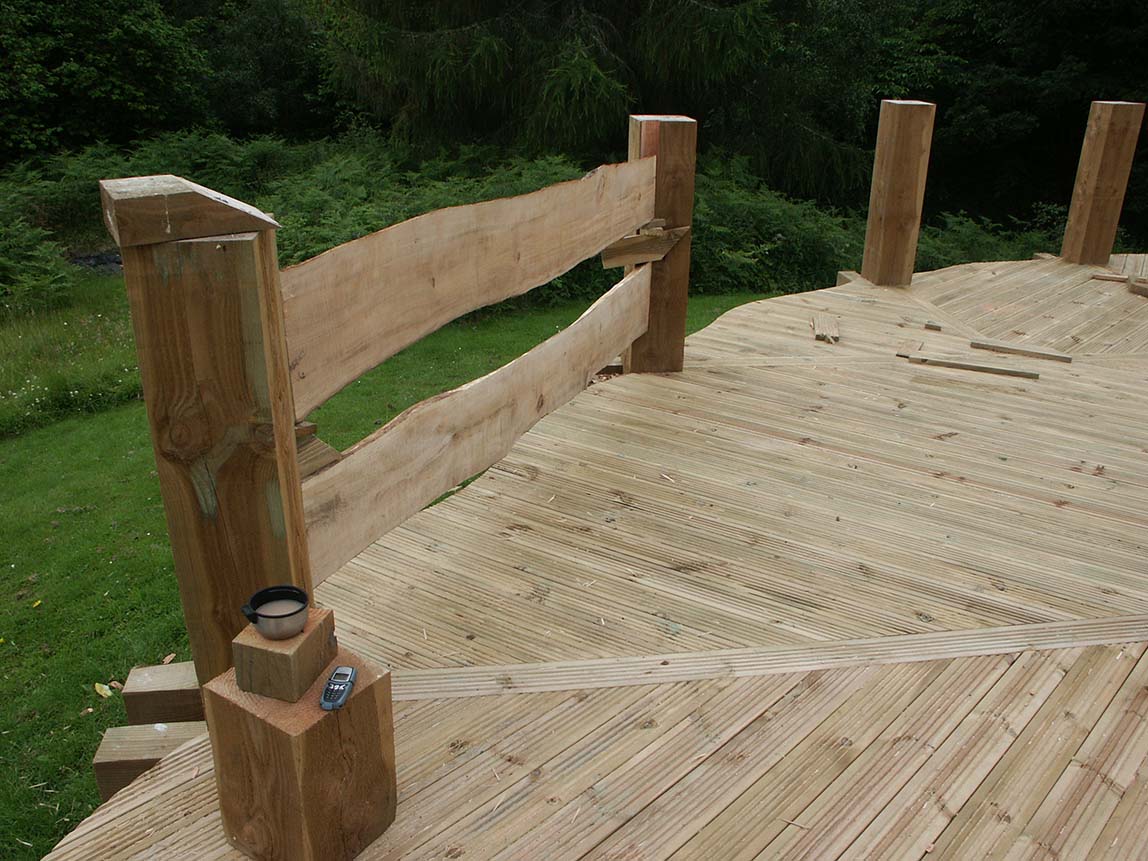
Trying out the beech guardrail between the posts. Planks were cut approximately 60mm thick using Scott's chainsaw mill attachment from a beech tree specially chosen by Scott. Slots were cut into the posts at an angle so the planks lined up with the centre of each post. Wedges were placed in the slots above each plank to allow for shrinkage. Note the edges of the decking planks cut to a wavy shape. I did this, so it is excellently done. Note peice of wood on top of the post for positioning my camera for animation shots.

Detail of the slots. It wasn't easy marking out and cutting the slots, as each post was different relative to the next, and they weren't all exactly vertical. A circular saw was set at the correct angle and depth, then drawn down or up the post to make a cut. The rest of the slot was chiselled out by hand.
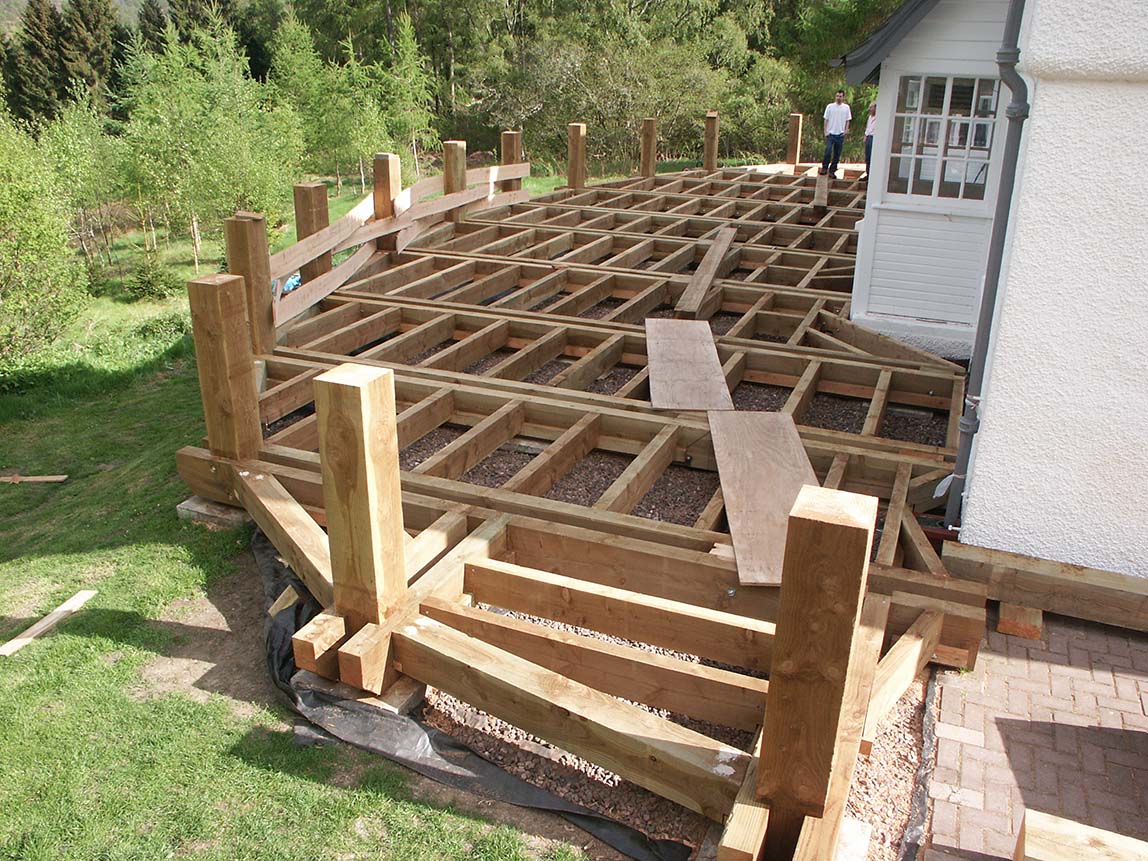
Tops of the posts cut to a point. A guide box was made, placed over the top of the posts and held in place with nails. The chainsaw was then run along the top of this box so that all the posts were all cut the same. You can see the guardrail planking starting to progress round the deck in the background.
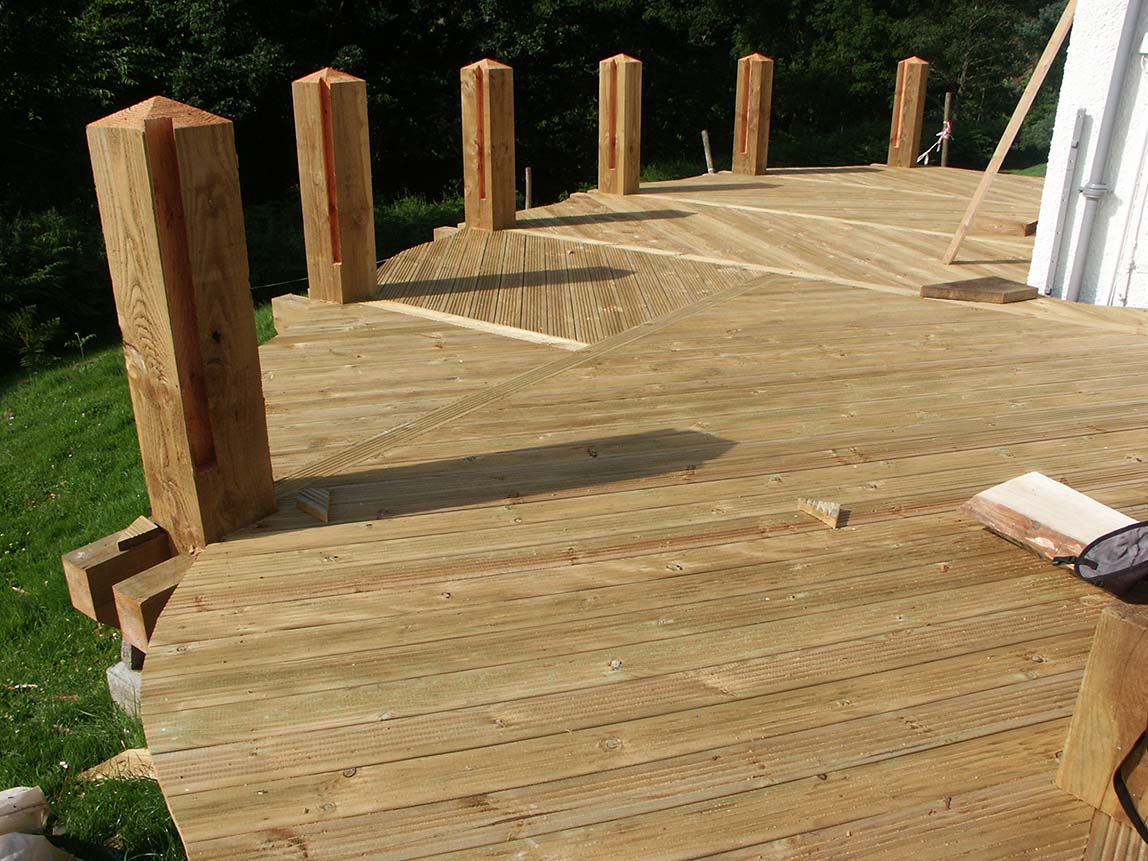
And the other end of the deck, looking very tidy.
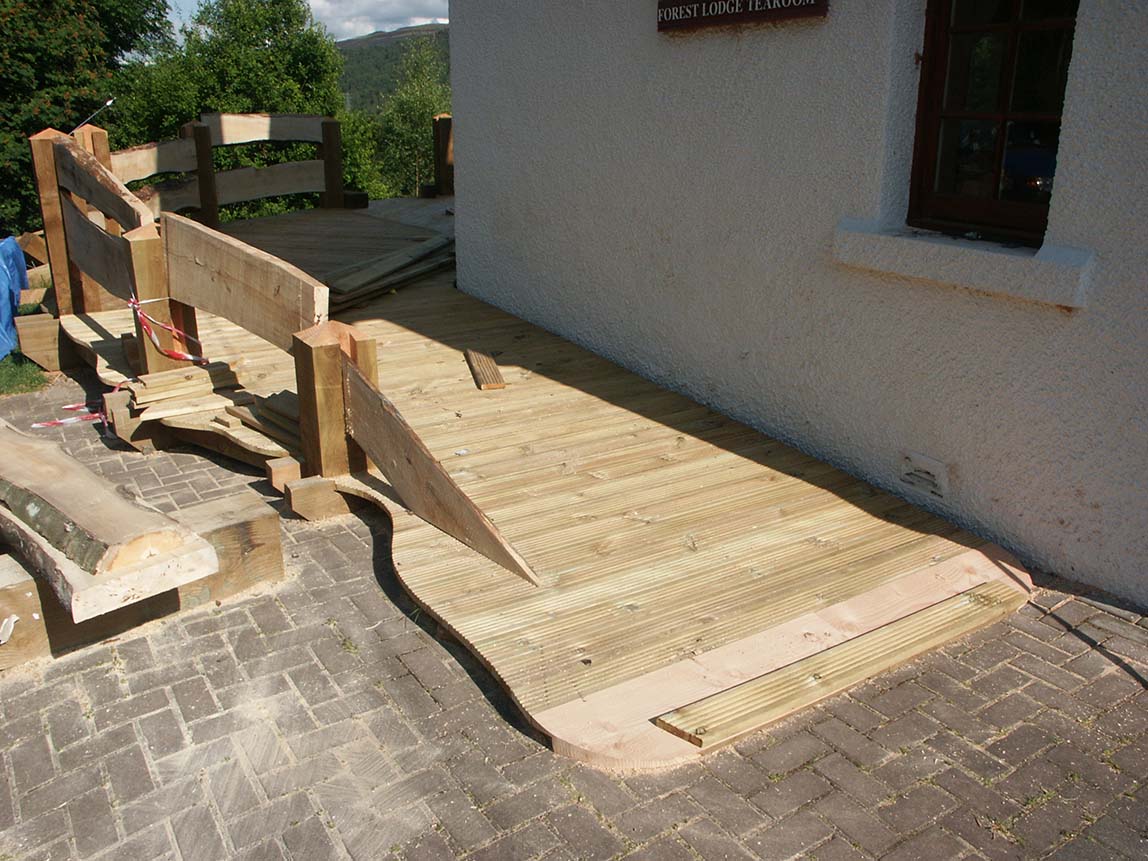
Almost finished wheelchair access ramp. Around this point I had to stop working on the deck and concentrate on my 
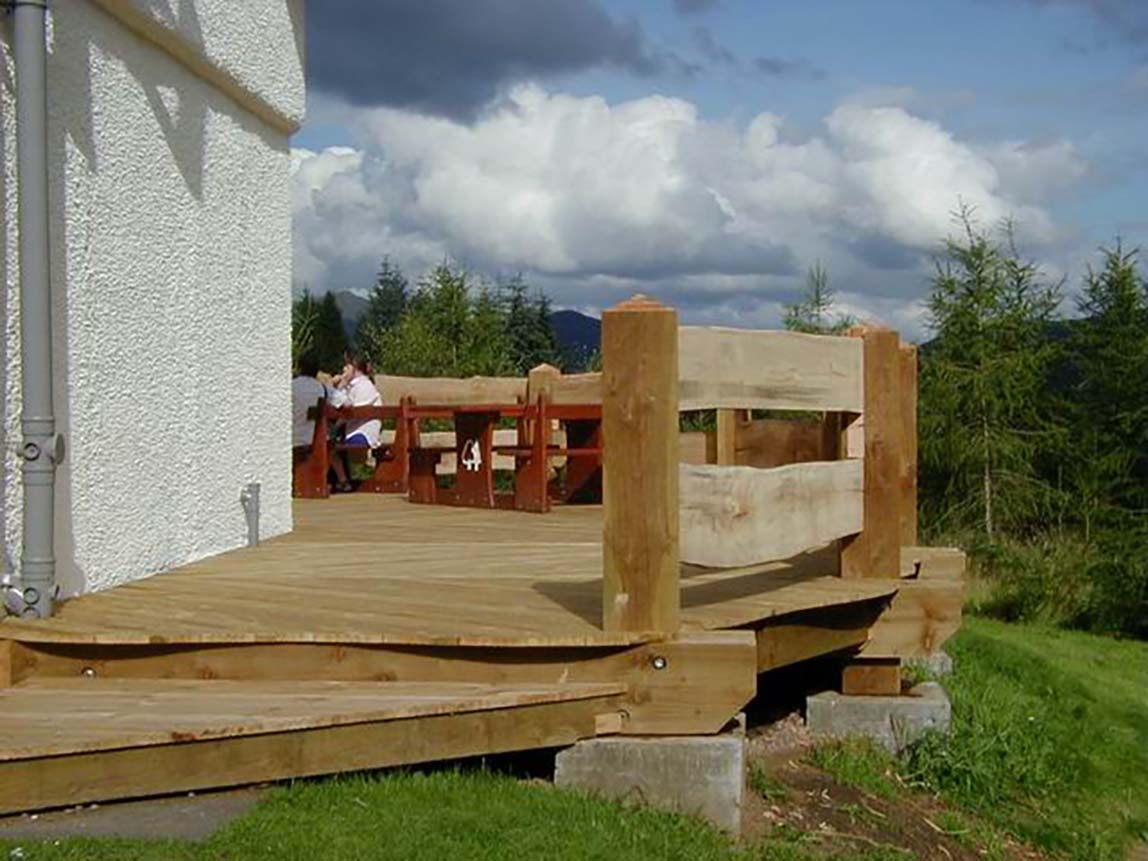
Finished south side access. This, and the following photo were supplied by Peter Fullarton from the Forestry commission. Peter was in charge of the whole deck operation including organising what trees were felled.
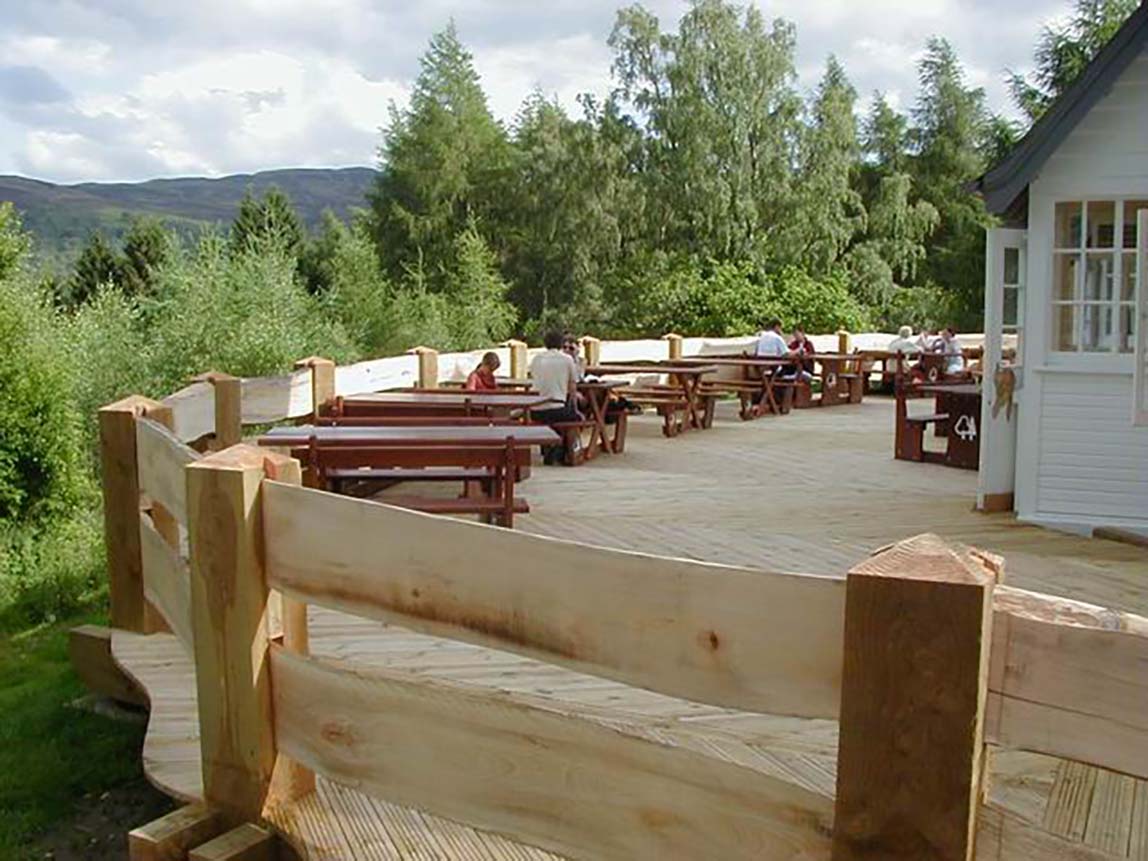
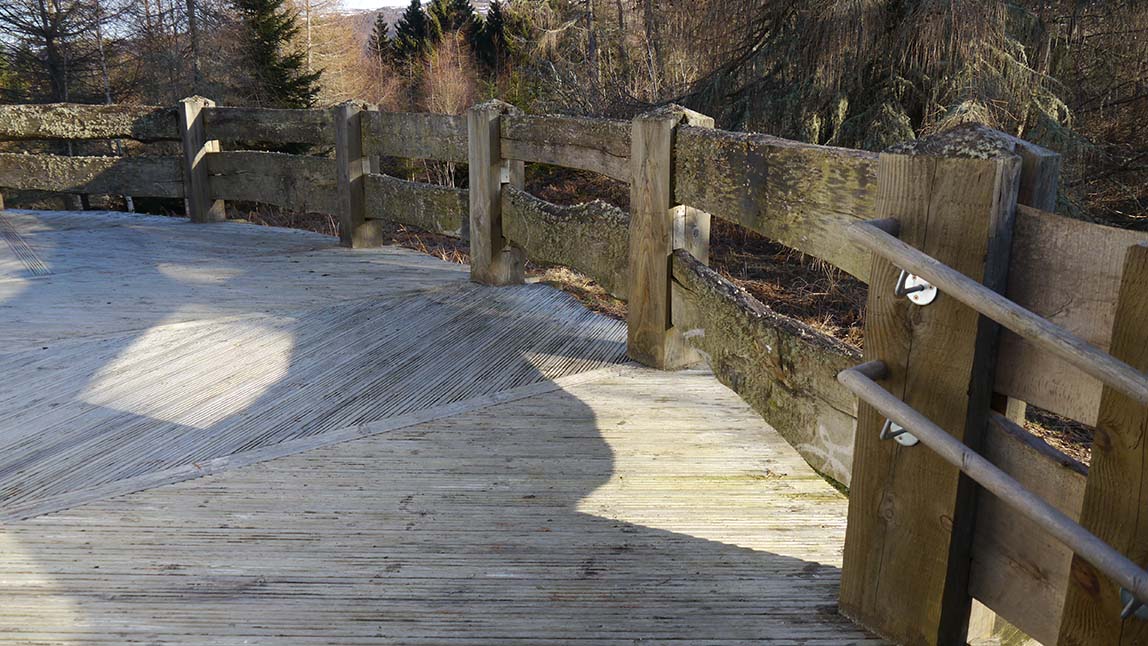
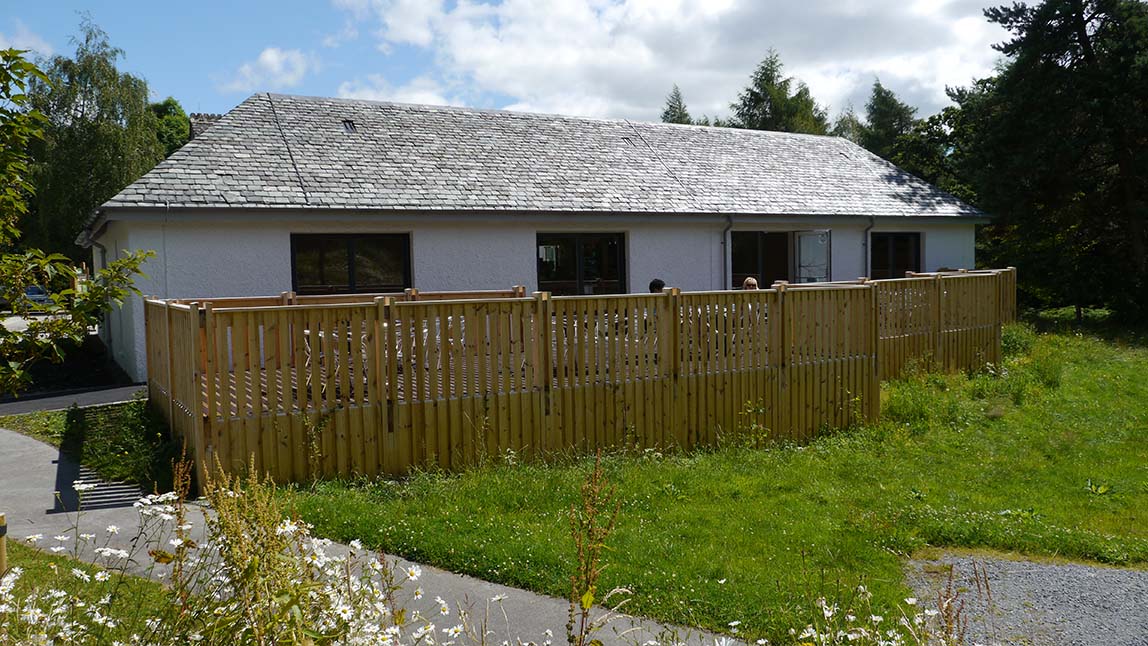
Whole deck finished showing guardrail.
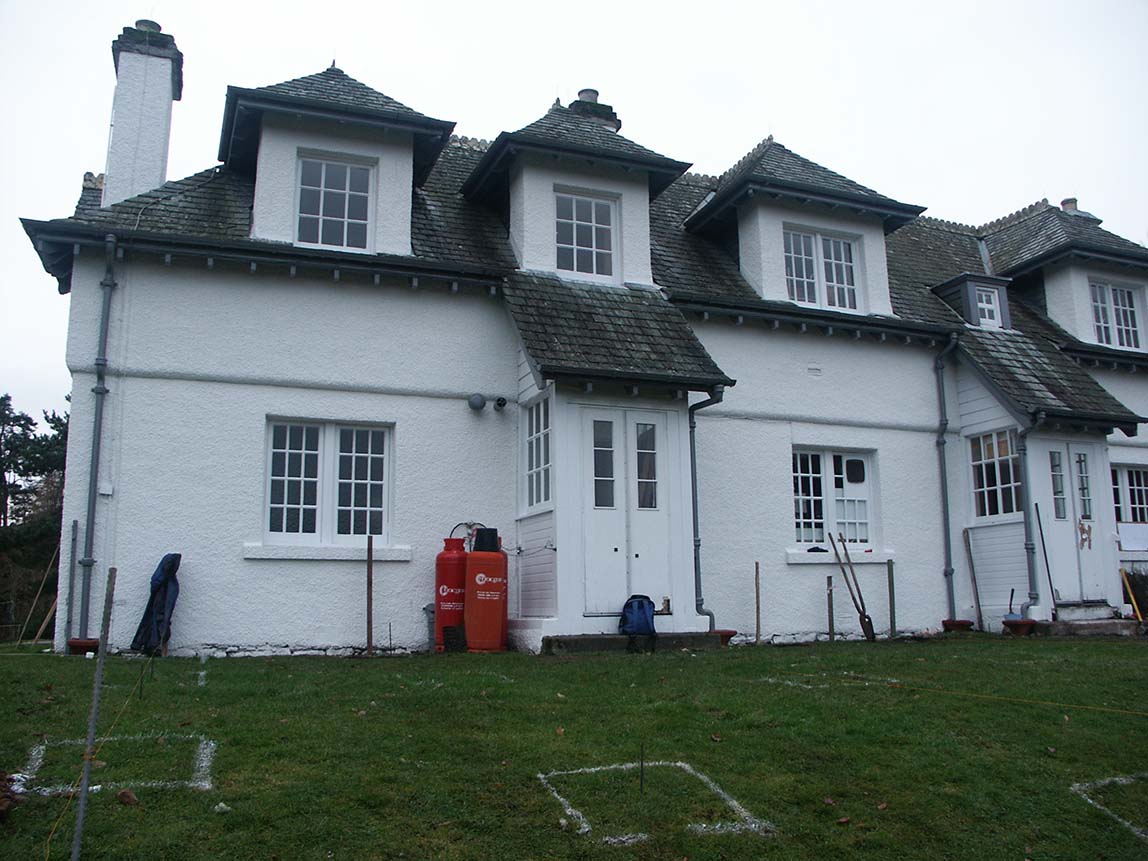
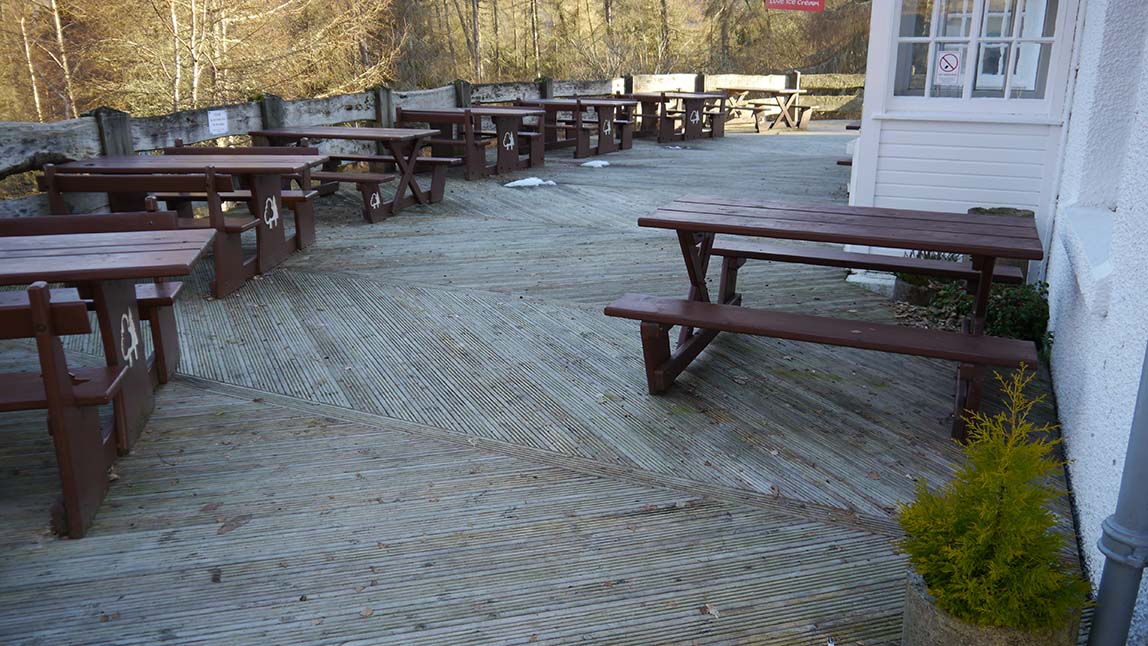
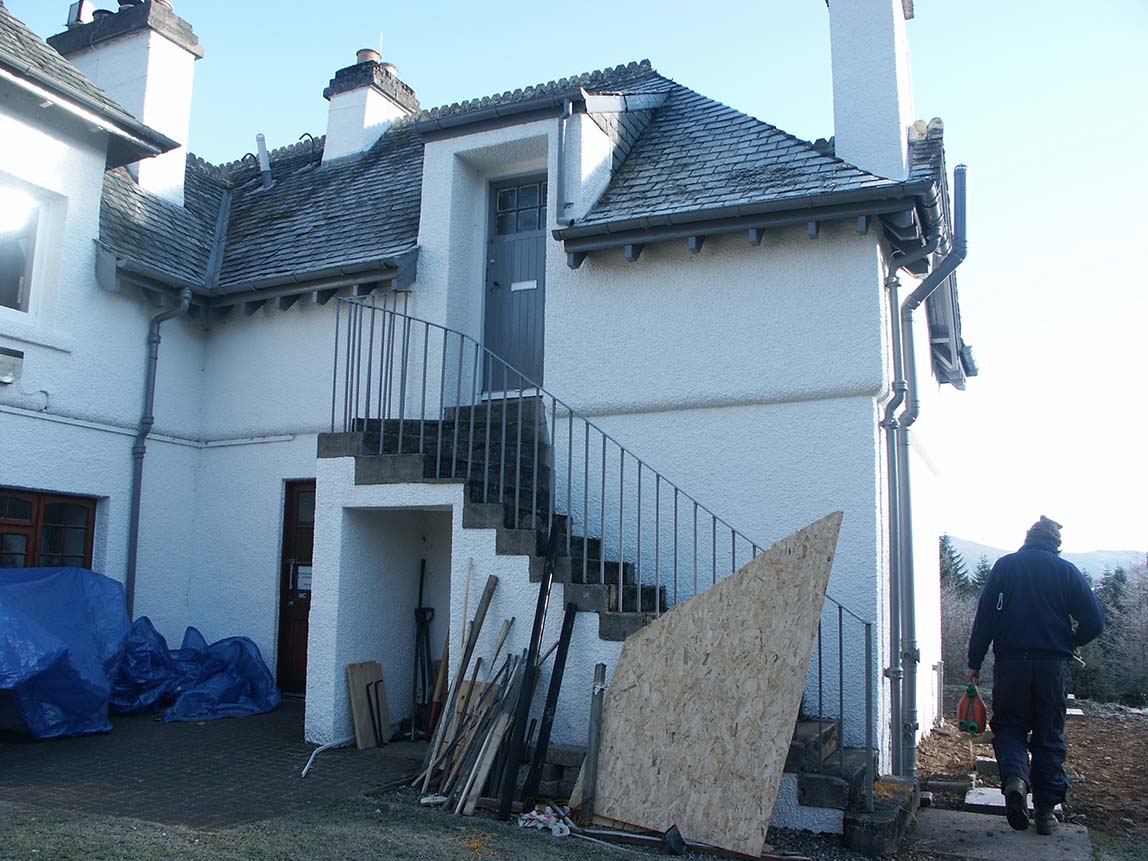
From this image onwards are from 27/2/2013. This is almost 10 years after the deck was built and I had not been up in this direction for a long time. I was just wanting to take some updated pics of the deck, but it was fenced off in parts and there was lots of construction equipment around so I talked to maybe the boss. I think he first said they were removing the deck, but he later said they were moving the deck to the other side of the visitor centre. I told him it was me and just one other person who built the whole deck over 6 months and he allowed me in to take pics. So I felt ok that they were just moving it. But what he actually meant was, they were destroying this one and building a far inferior deck on the other side of the visitor centre. I was very dissapointed to find that out and it seems like a massive waste as the deck was still very strong at this point.

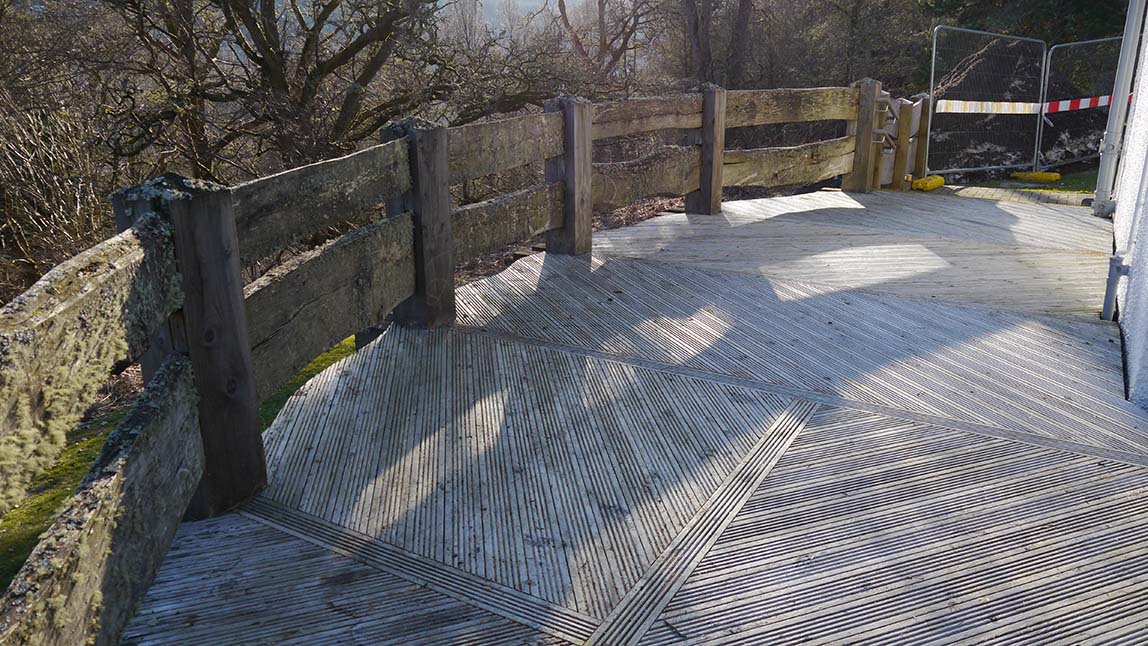
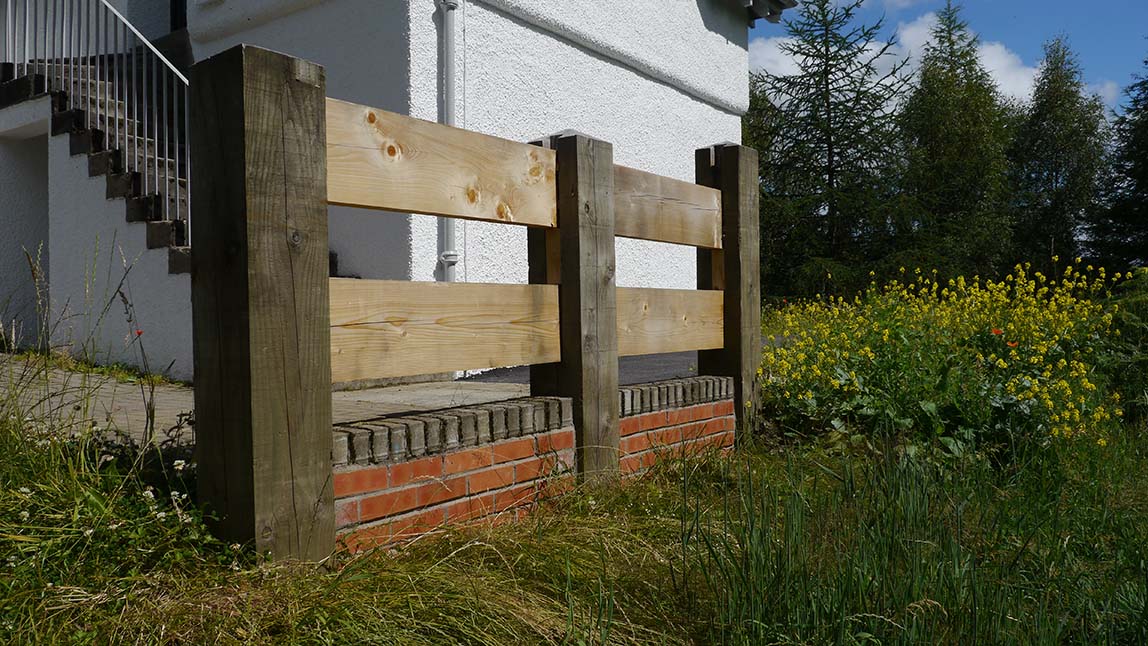
You can see they had changed this access ramp from our original design where the guardrail tapered right down towards the front. And they added handrails either side. I don't know when these changes were made but it wasn't by me or Scott though they did copy the fencepost and guardrail construction to match ours. I think years before I had seen someone online saying they slipped and fell on the deck so they must have looked at the whole deck again for health and safety.
Shortly before finishing the deck in 2004 we had a guy visiting us who sold a coating for floor planks. It was a type of varnish that protected the wood from rotting and would stop any slidy mould from forming and it also had some sort of grit in it which made the surface safe to walk on in winter. But, I left for Portugal just before the deck was finished and Scott had no more to do with the deck after it was finished so he assumed the forestry commission would take over the maintenance of the deck which should include adding this coating and reapplying it when needed which I think might have been every 2 years.

I remember us coating the planks soon after laying the deck with a white watery liquid which soaked into the wood. That didn't have grit in it and that would also have to be reapplied regularly if they decided to keep using it.
I remember it being Scotts intention to not protect the guardrail wood and to allow it to age naturally like this which I think looks good with moss growing on it. The wood is thick enough that it would still be strong without protection.
I took a few short videos of the deck this day knowing it would be the last time I see it in this position (but not knowing I would never see the deck again). While filming, I tried to lift my excellent, hidden trap door to ease access to the gas bottles. But it had probably never been used and it was sealed solid with corrosion.
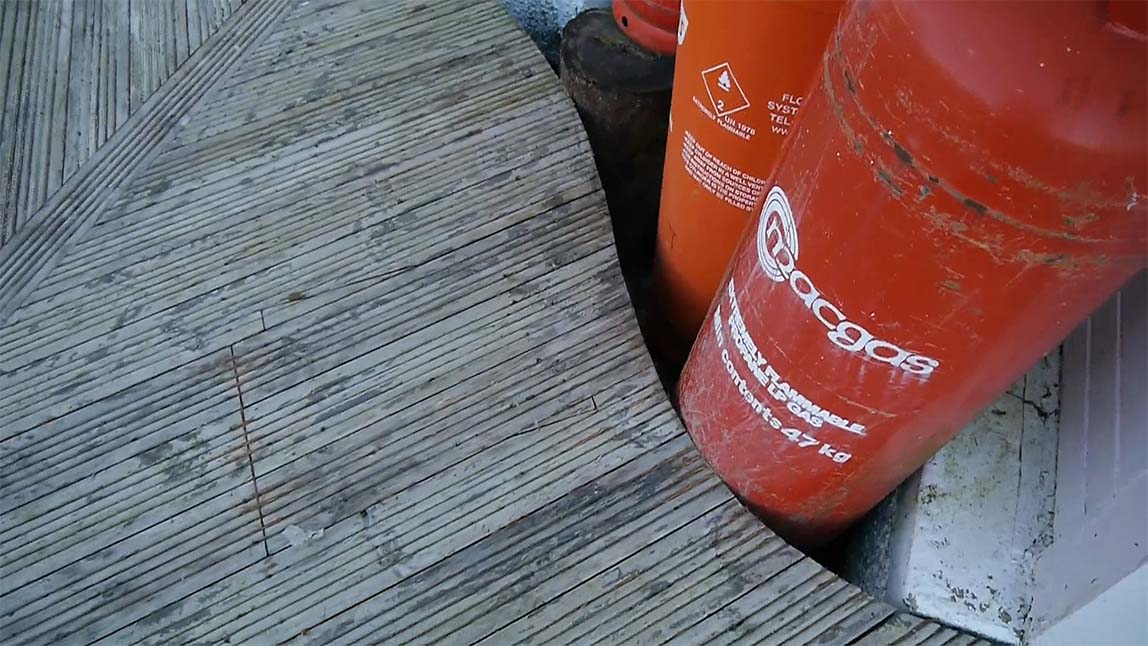
I only realised when updating this webpage in 2024 that I don't have any pics at all of my trap door. So these are screenshots from my video that day. The purpose was to protect the edges of the decking which overlapped the joists by a few inches in this corner. When lifting the heavy gas bottles they could have easily broke the overlapping edges. As you can see here the door is almost invisible.
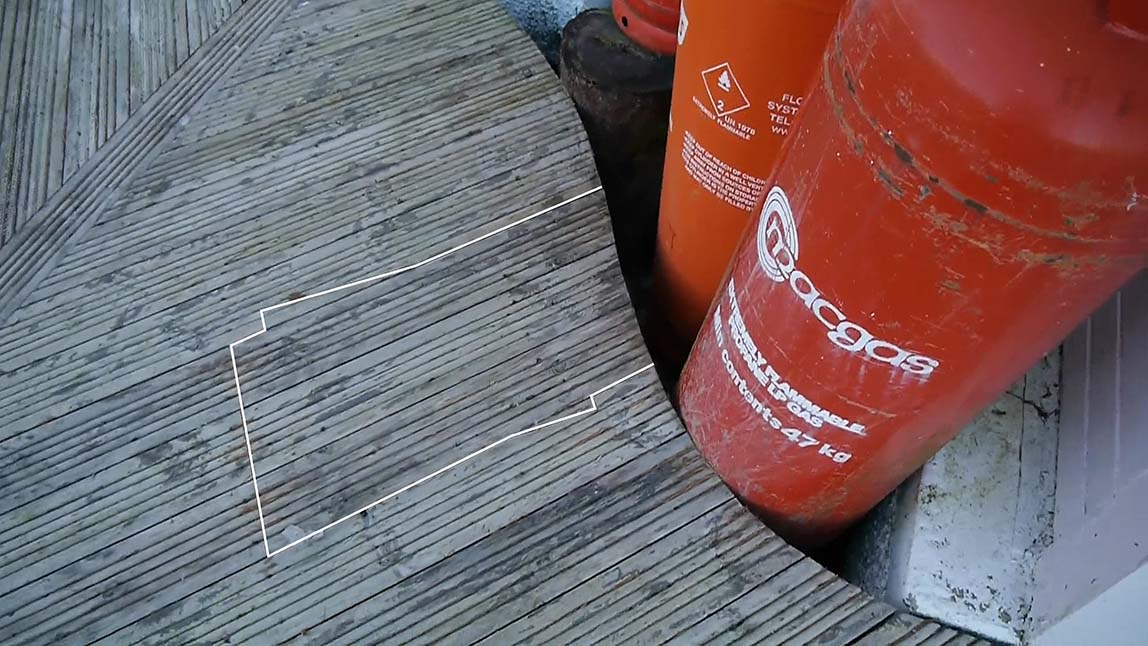
This shows the edges of the door. It was hinged on the left most side from this view and would lay flat on the deck when fully opened leaving an area of the joists visible. As mentioned, I doubt if it was ever used but you can see by the bottle that is touching the edge of the decking that the decking maybe wouldn't have broken anyway.
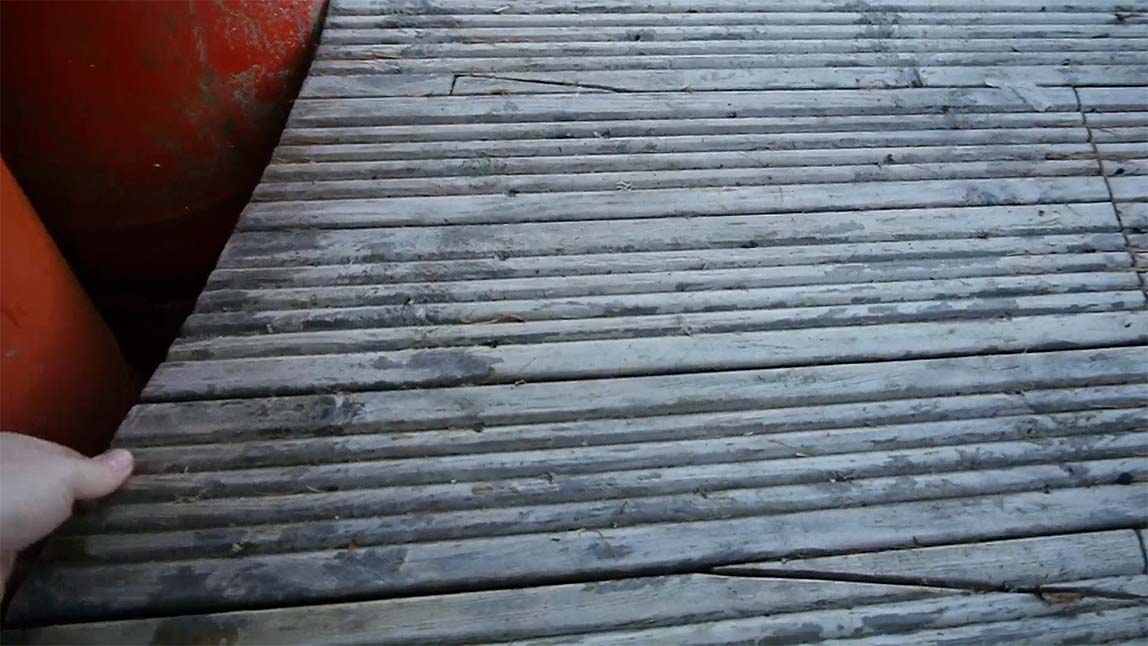
And this is me trying to lift the door. Because the edges were so tight fitting they must have sealed up with dust/dirt etc. over time basically welding the door closed. I couldn't budge it at all.
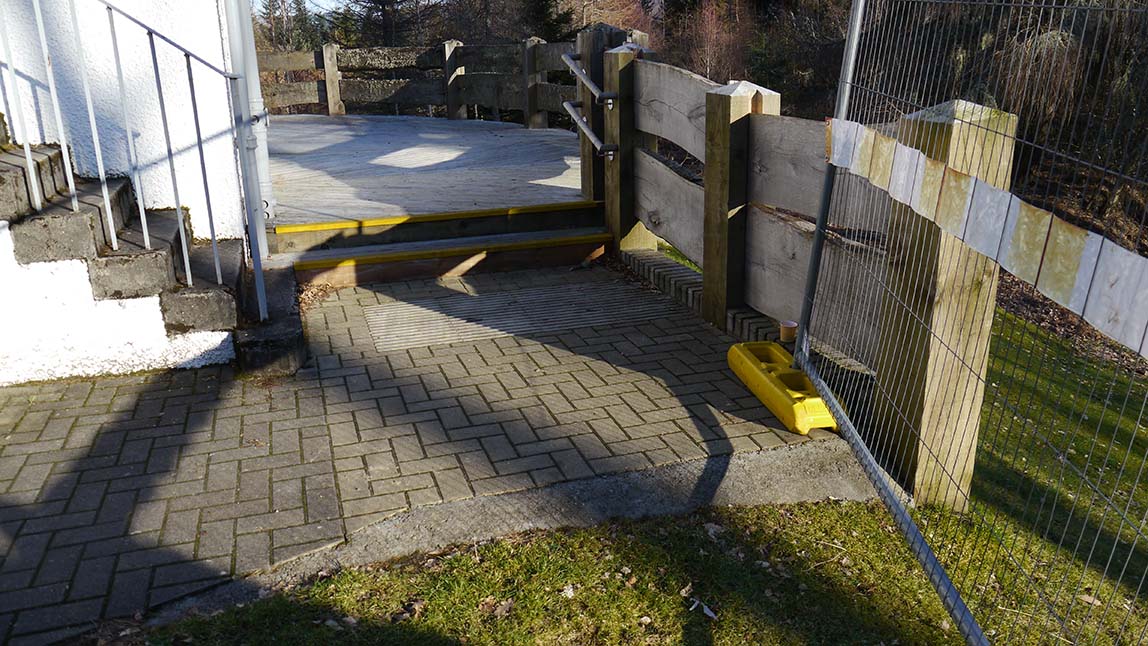
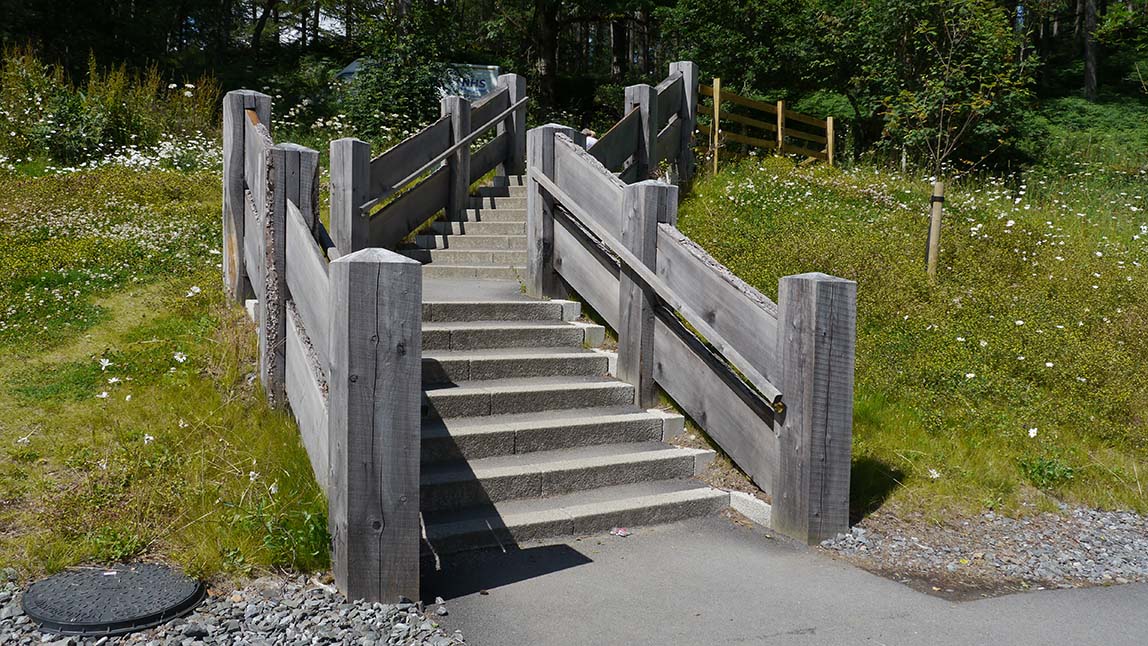
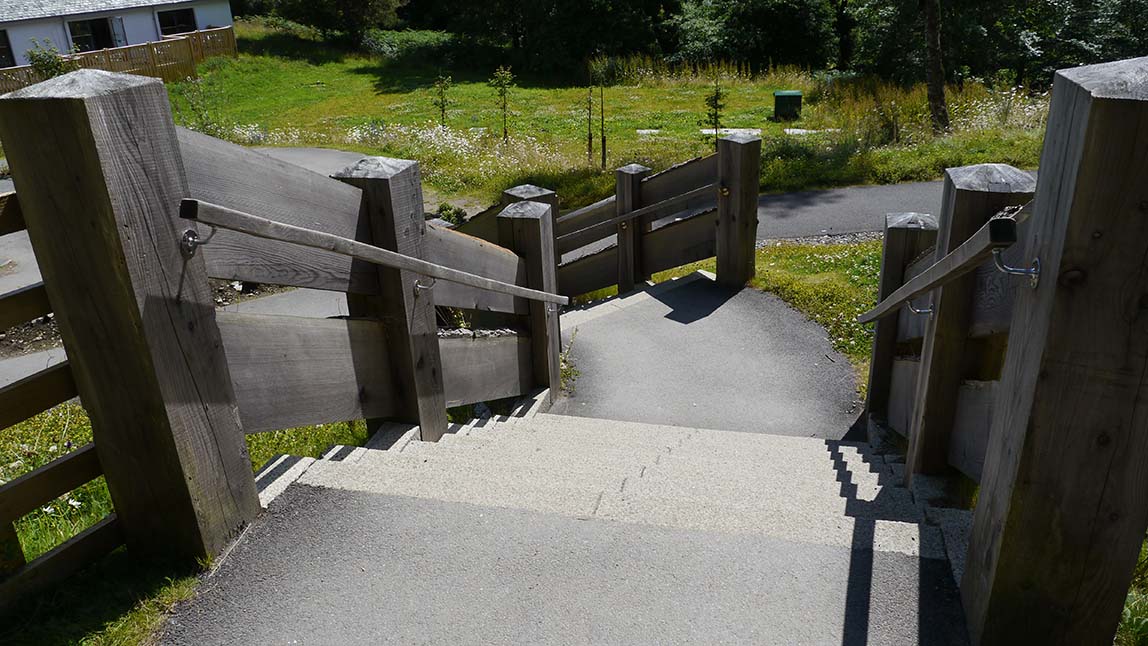
Also the guardrail at this end of the deck was changed with a short handrail and yellow edges on the steps to make them more visible. Again they added 3 more posts with guardrails copying our style and they removed our triangular step.
And another view showing the moss on the guardrails blending in nicely with the trees in the background.
From this image onwards are from 17/2/2014. This is 10 years after the deck was built and as you can see it is gone forever.
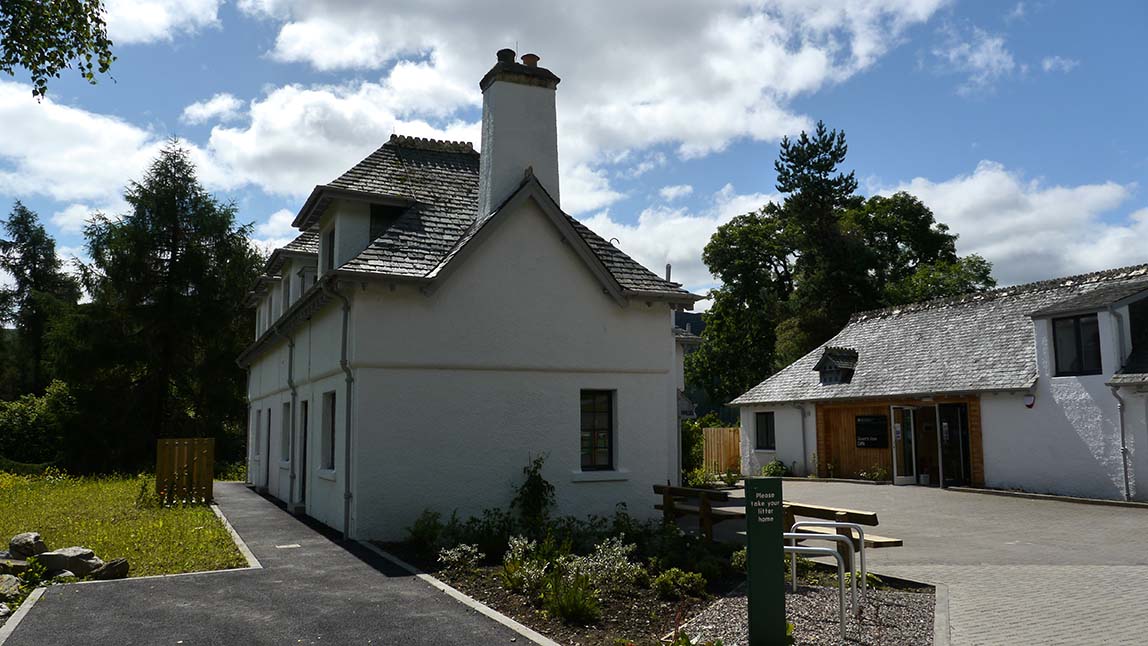
The cafe rear door entrance vestibules are also gone with their roofs that matched the rest of the building.
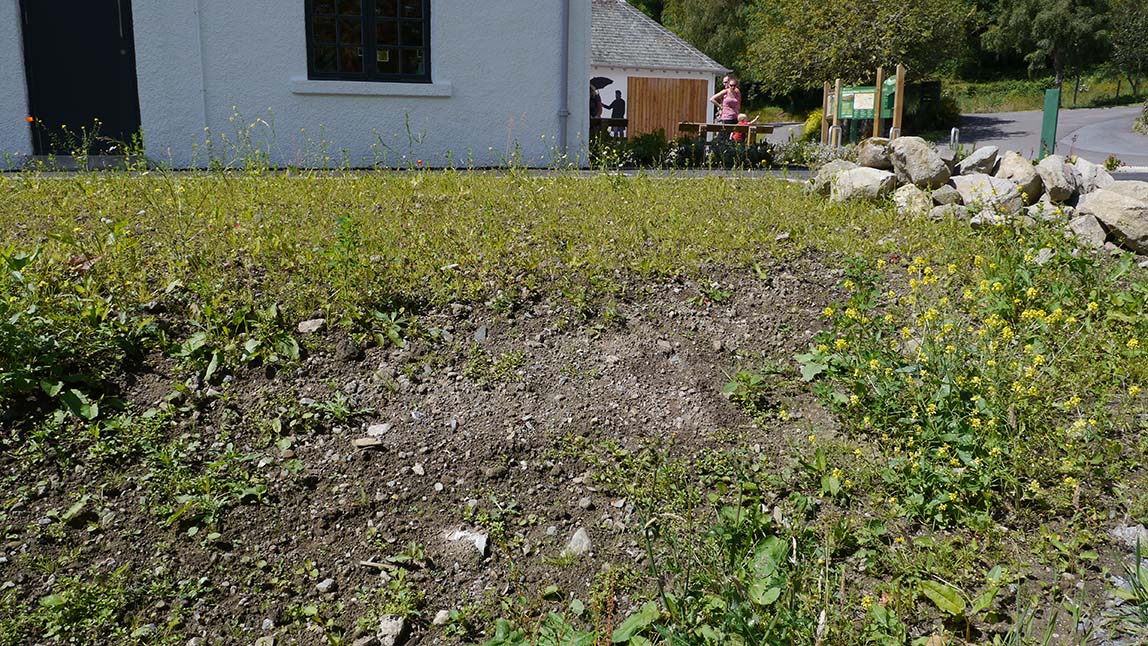
This view would have been looking under the deck at the foundations.
And this view.
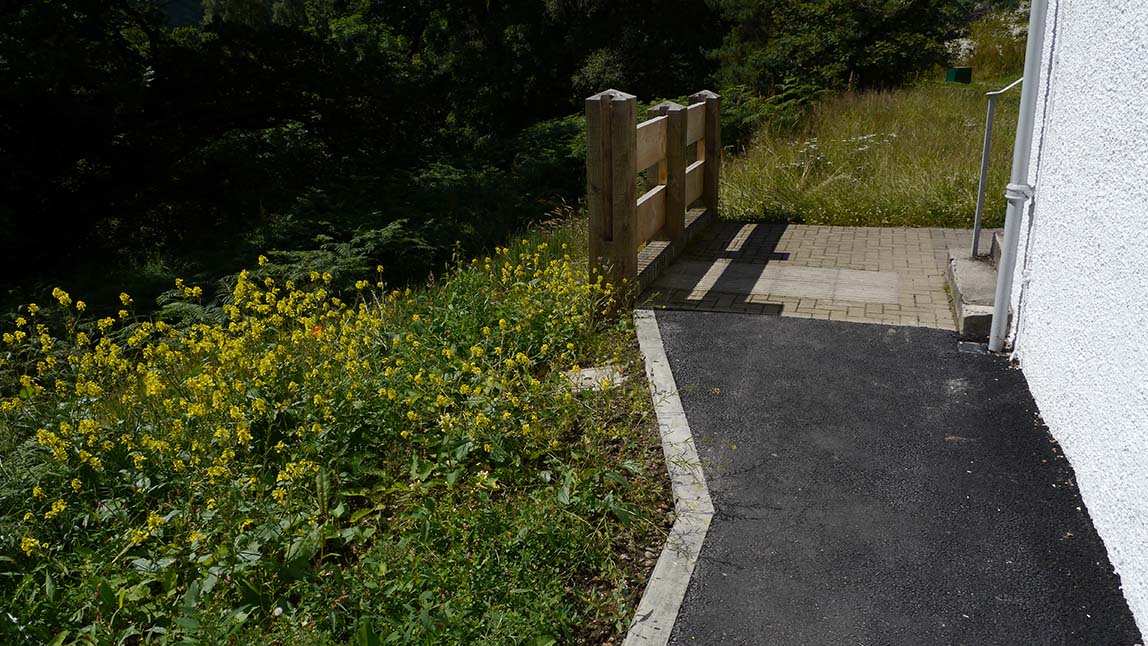
So they now have a tarmac path.
With a tiny fenced area for bins maybe.
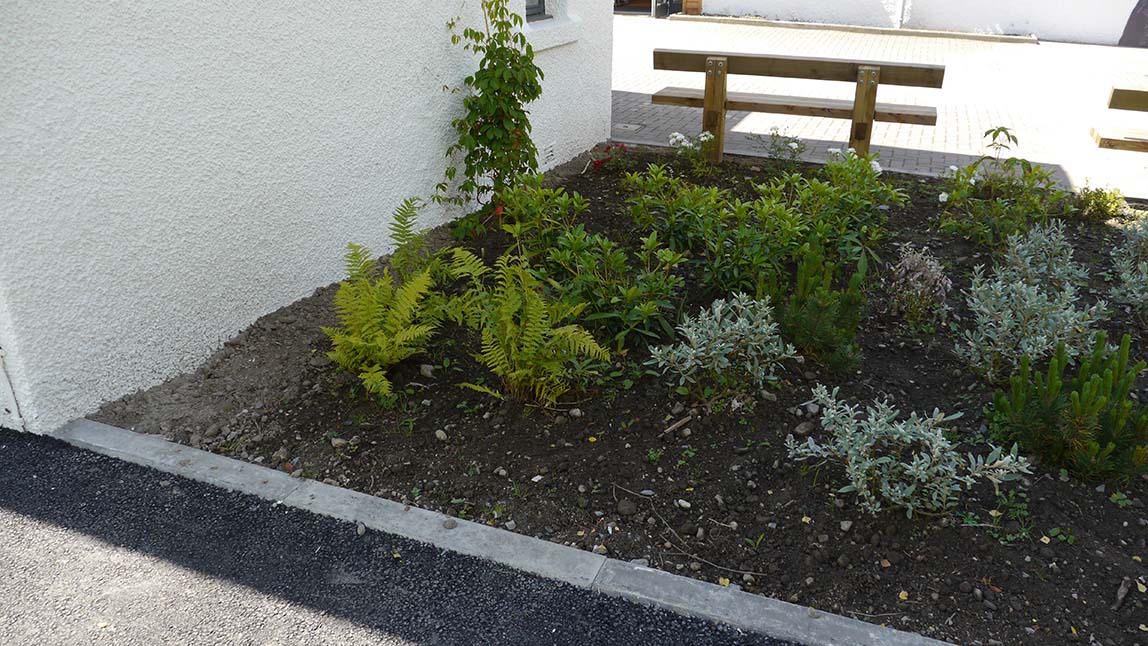
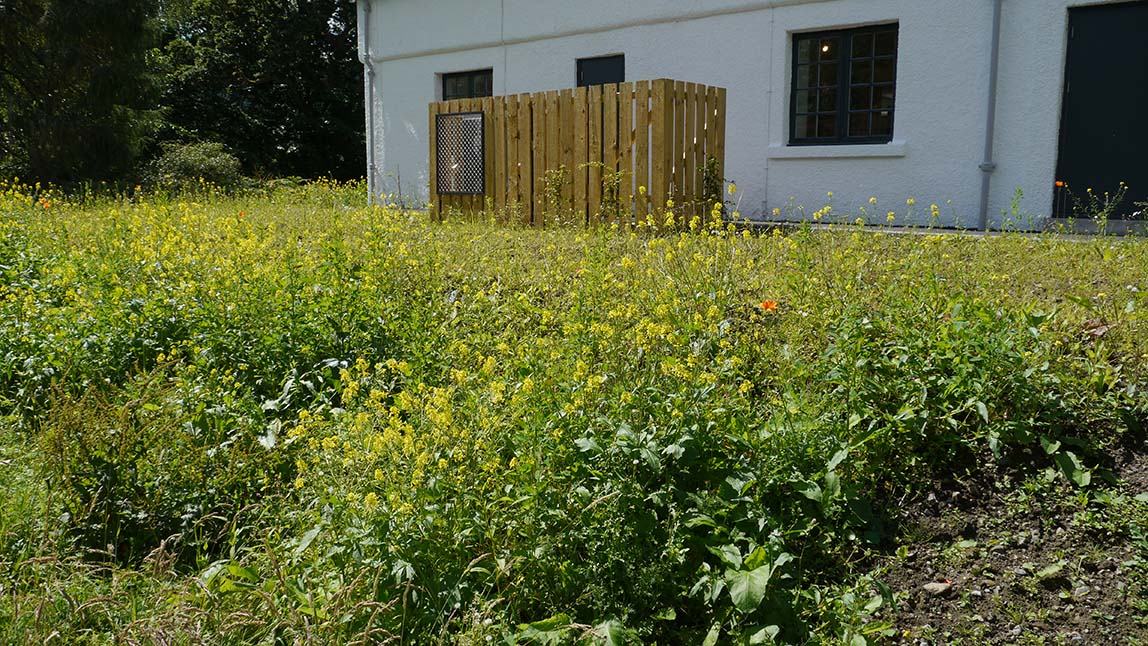
And this garden area where the disabled access ramp was.

And from the other end looking back. I wonder what they did with all the wood from our deck and the huge concrete foundations?
And what was the rear entrance where they kept the part of the fence they built themselves.
Only when adding these pics to this web page, I noticed they built this small brick wall so removing the fence would leave that wall needing repaired.
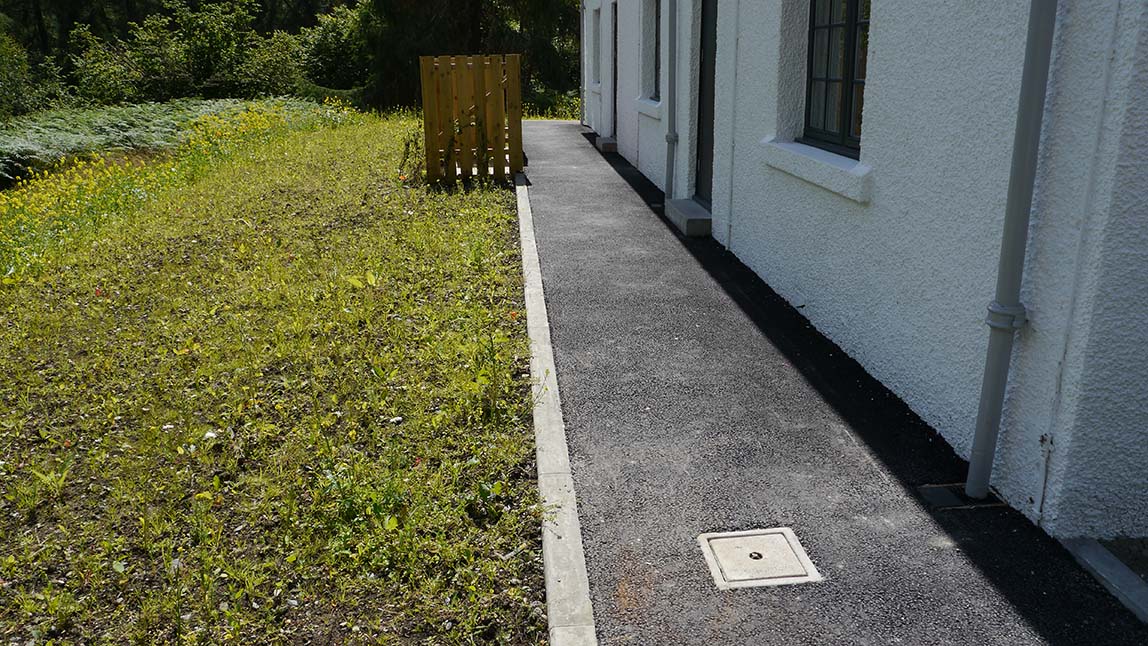
And I also only noticed when adding these pics that this area has been paved to match the paving next to the stairs.
But I then looked through all my pics of the building trying to find a pic showing what the side of the steps looked like before. You can see they have created a whole new path carrying on the old paving from under the stairs.
And this is the far inferior deck they built to replace our work of art. It makes me wonder why we went to all the trouble of making ours massively overly strong because of the Heysel stadium disaster (mentioned in my main Queens view web page) when they have obviously not done that here.
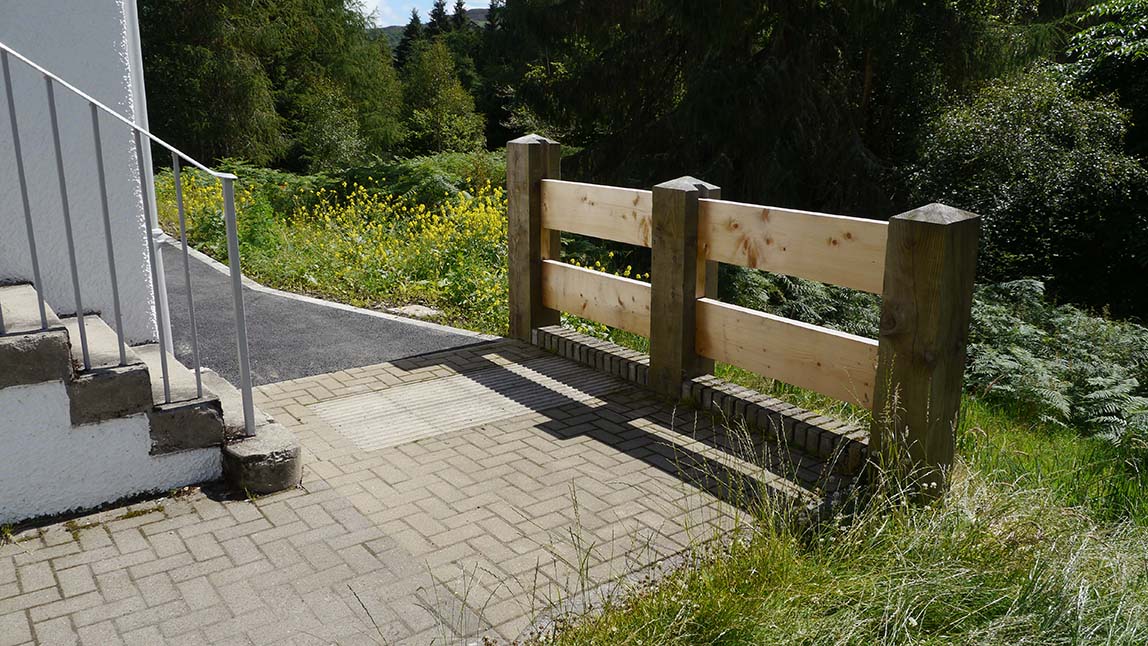
I only noticed these steps that they had built to match the deck on this day, but it could well have been there when I was here in 2013 before our deck was demolished.
It uses the same posts and guardrail design but with added hand rails for safety. I took a few 3d pics this day. All of my 3d pics are on my website here in my 3D PHOTOS PAGE
available to view using lots of different 3d viewing methods eg. red/blue glasses, side by side, crosseye etc.

And a view showing the location of these steps (which lead up to the actual Queens view) and the new massively inferior deck which it will always be known as to me.
Click on the donate button to give Craig Hood some money for no reason at all.
